GAME ASSET TASKS
Redesigning Resident Evil.
PROJECT INTRODUCTION 1.0
For this project, I was tasked with creating hypothetical assets for a game of my choice. I chose Resident Evil 4,
which was released in 2005 by Capcom. As an older game, some of the controls feel outdated when I replay the game, so I thought it
would be a good choice for this reimagining. I began to brain-storm ideas for assets, considering the style and aesthetics of the
game, as well as keeping in mind which aspects I would change or want to improve. Here is my design and thought process:
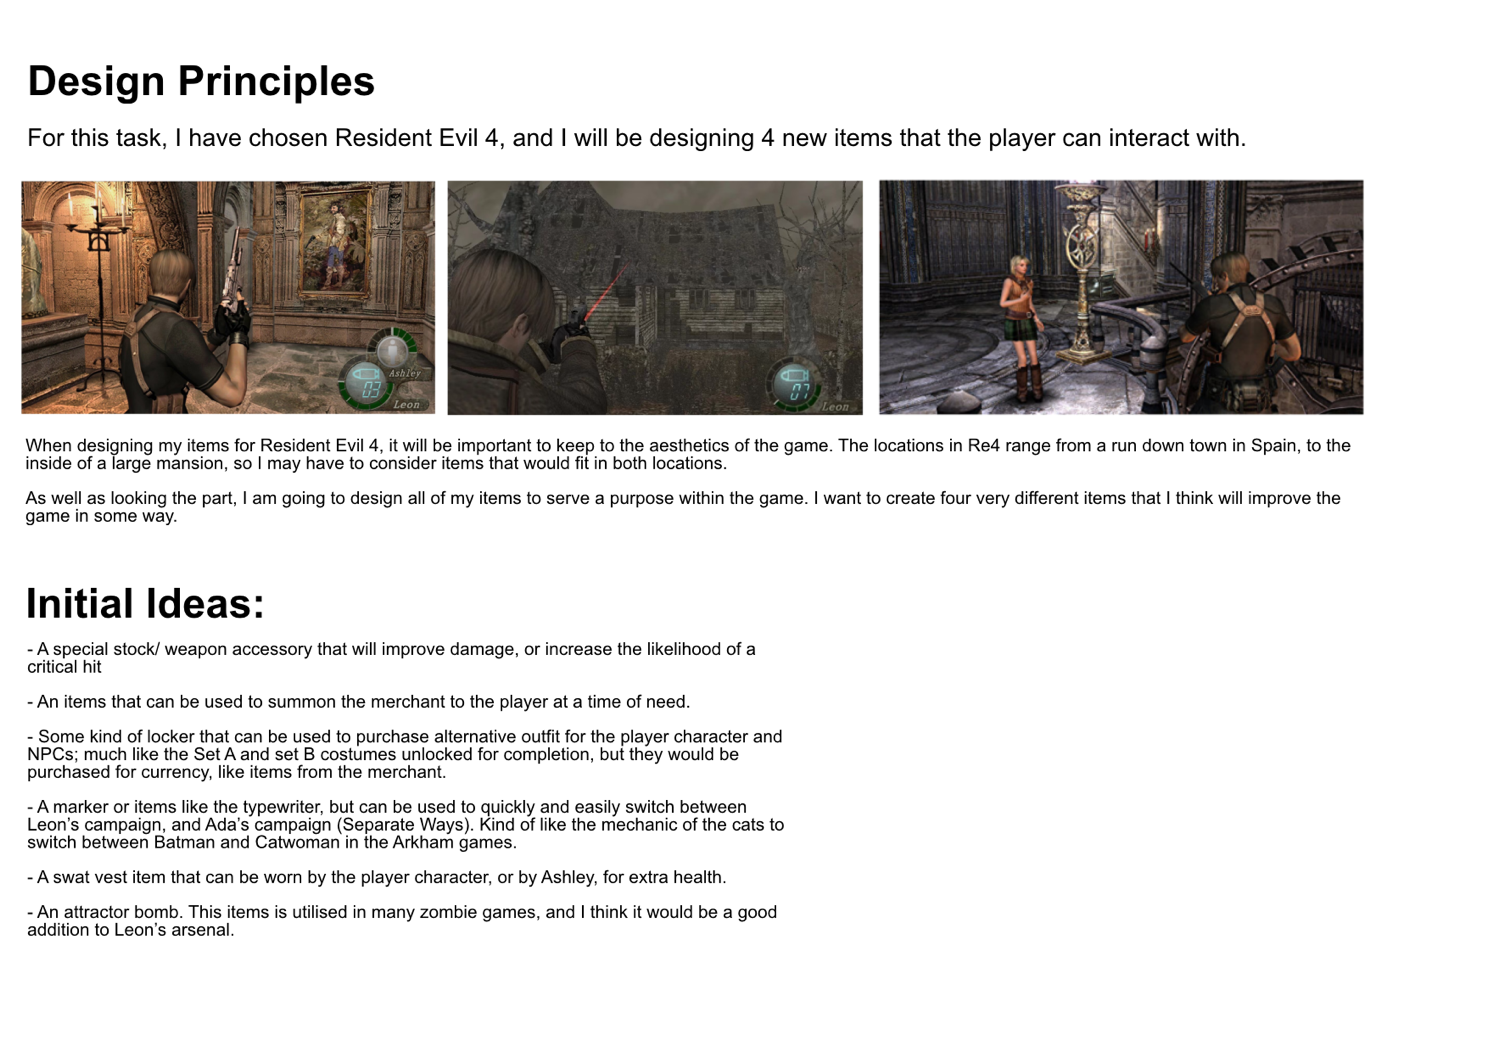
Figure 1.0.1, Initial Ideas
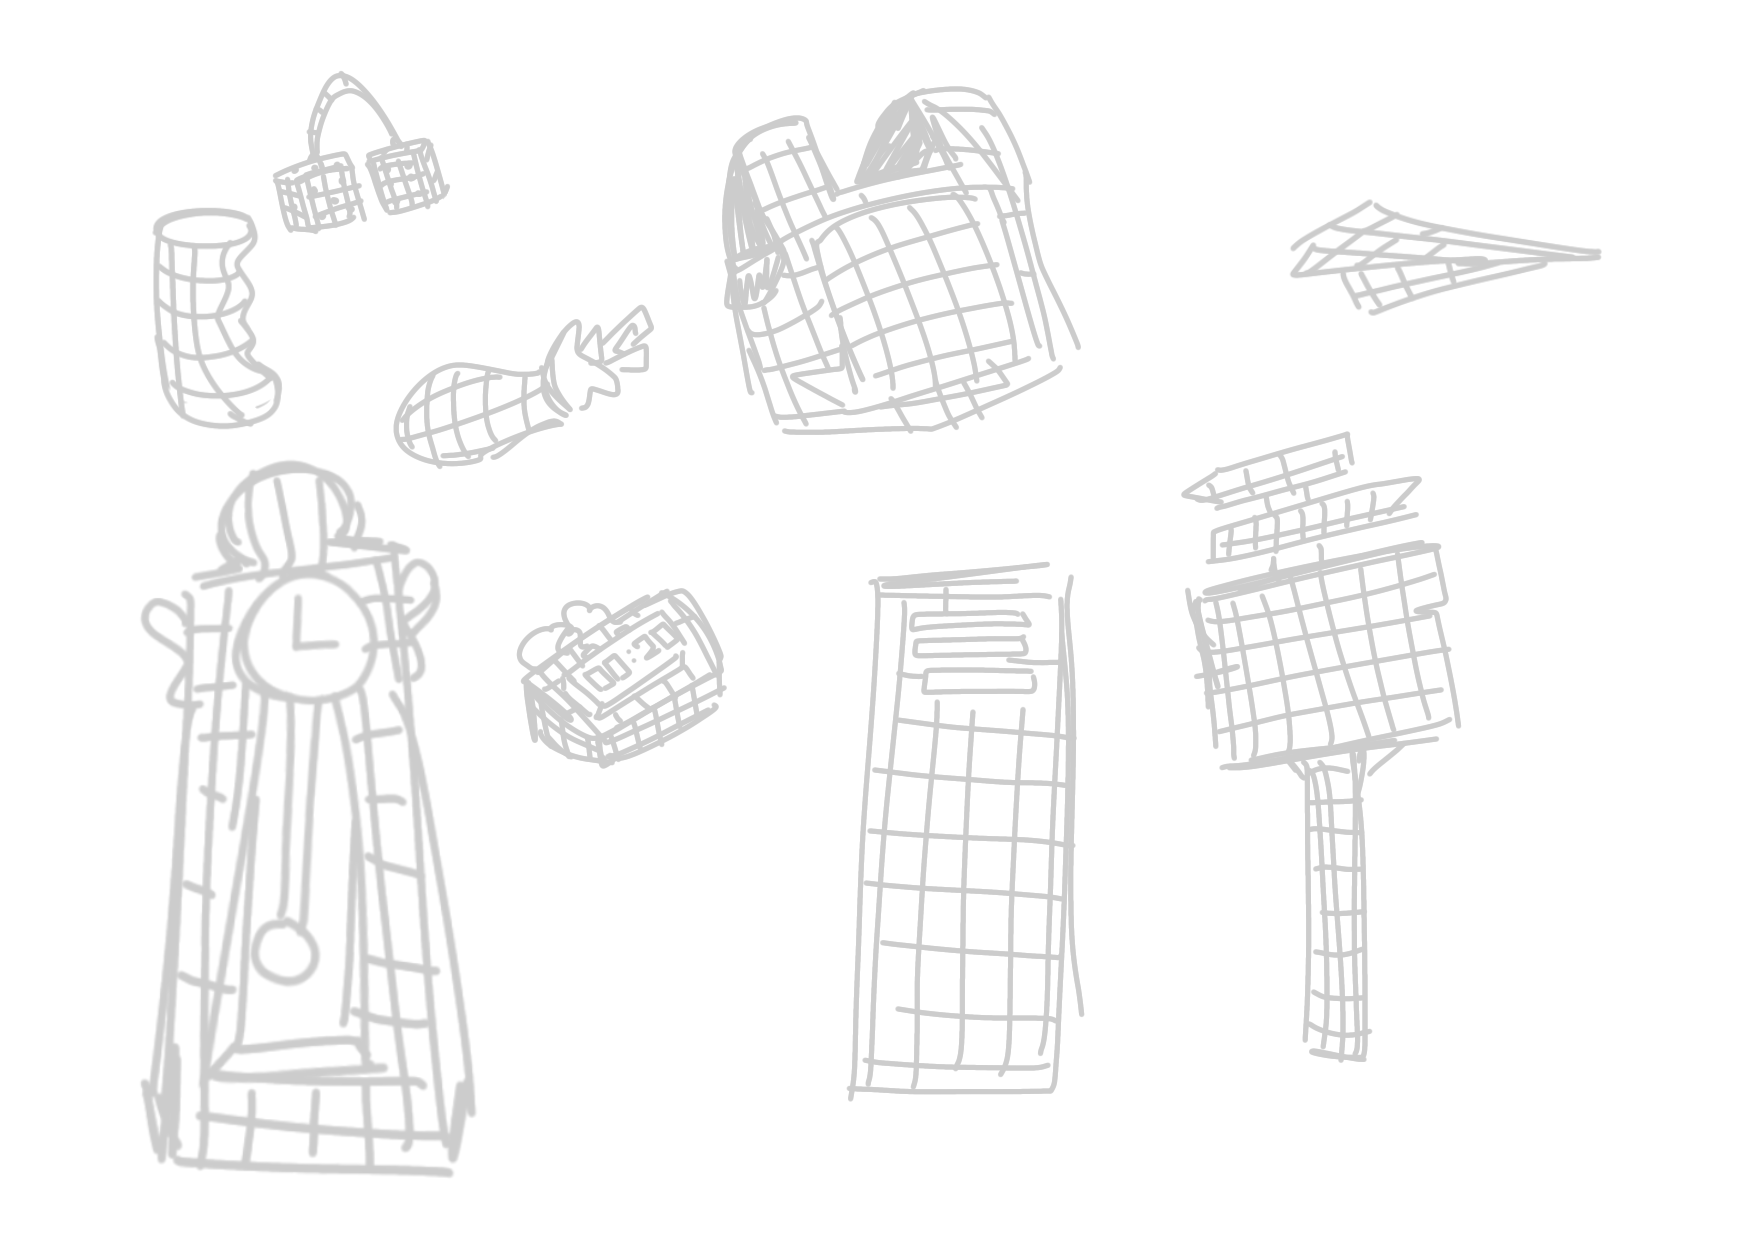
Figure 1.0.2, Initial Sketches
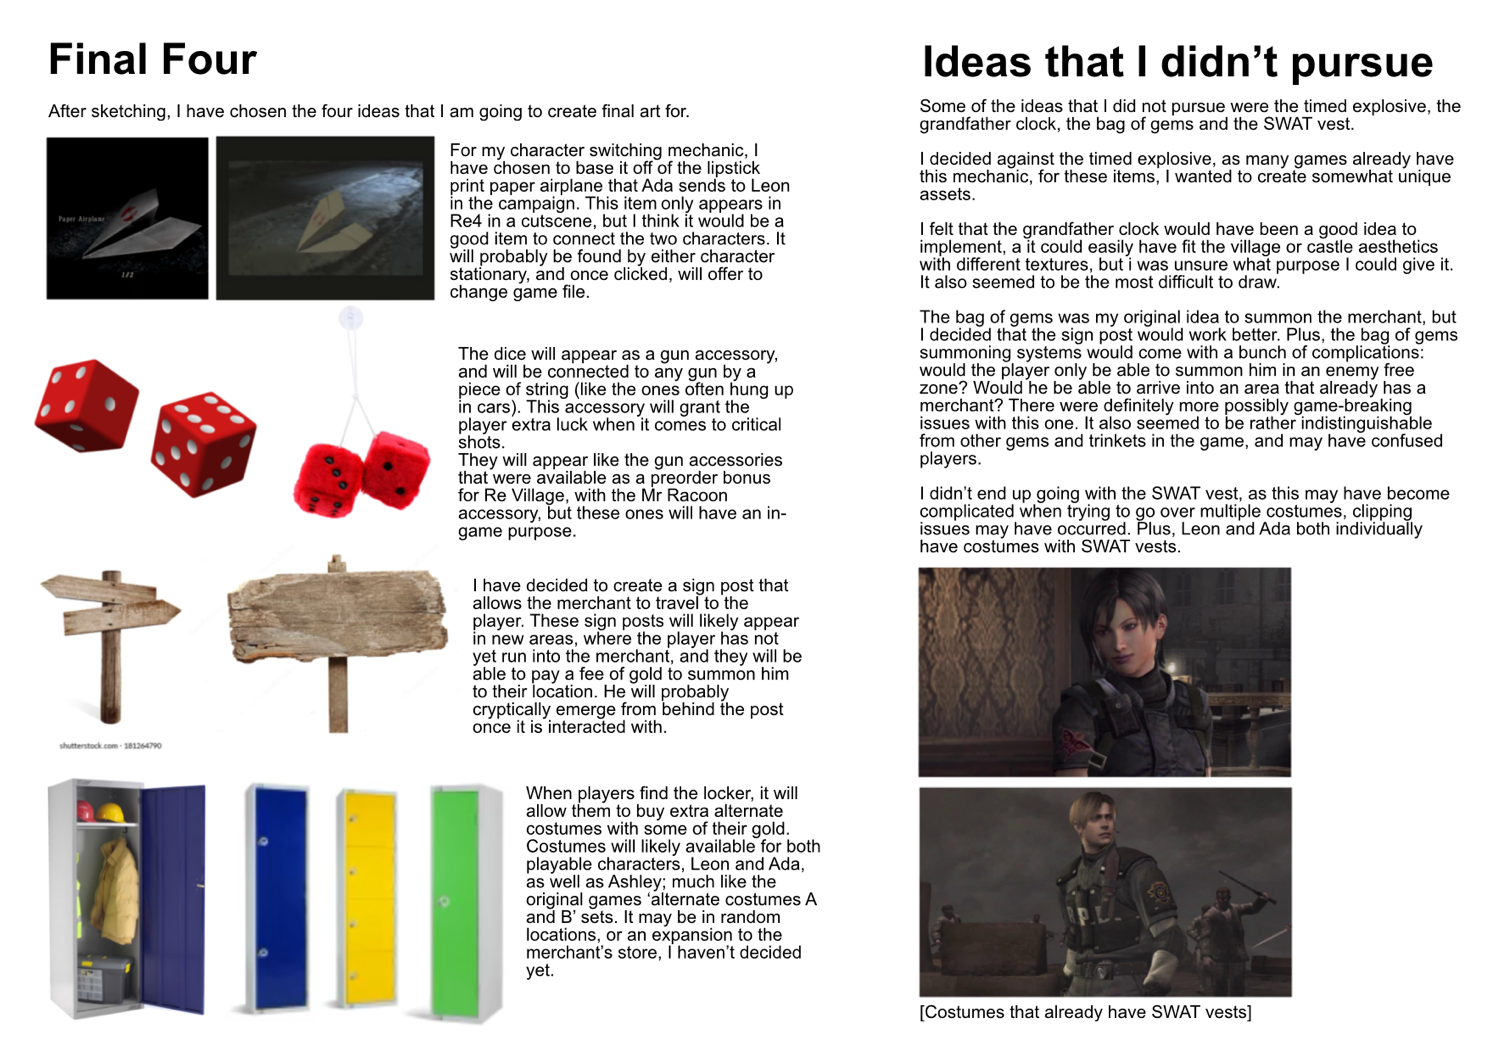
Figure 1.0.3, Final Four
EXPERIMENT PHASE 1.1
Once I had decided on my final four ideas: the sign post, the paper airplane, the dice charm, and the locker, I began to work
on the design of each item.
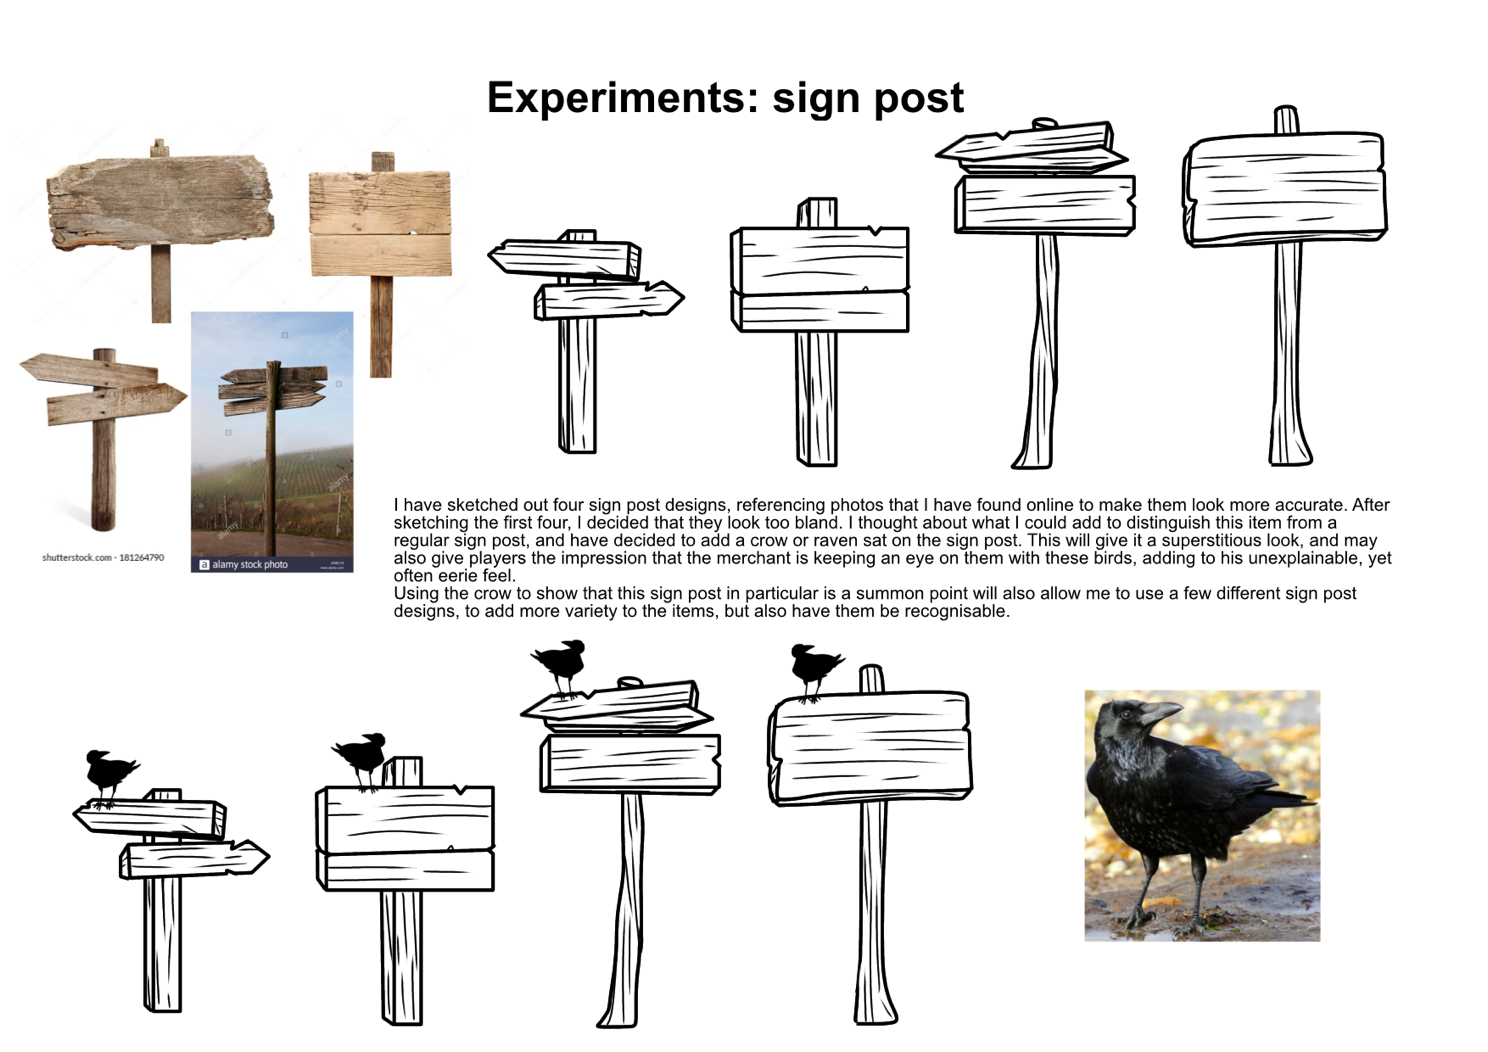
Figure 1.1.1, Sign Post Design
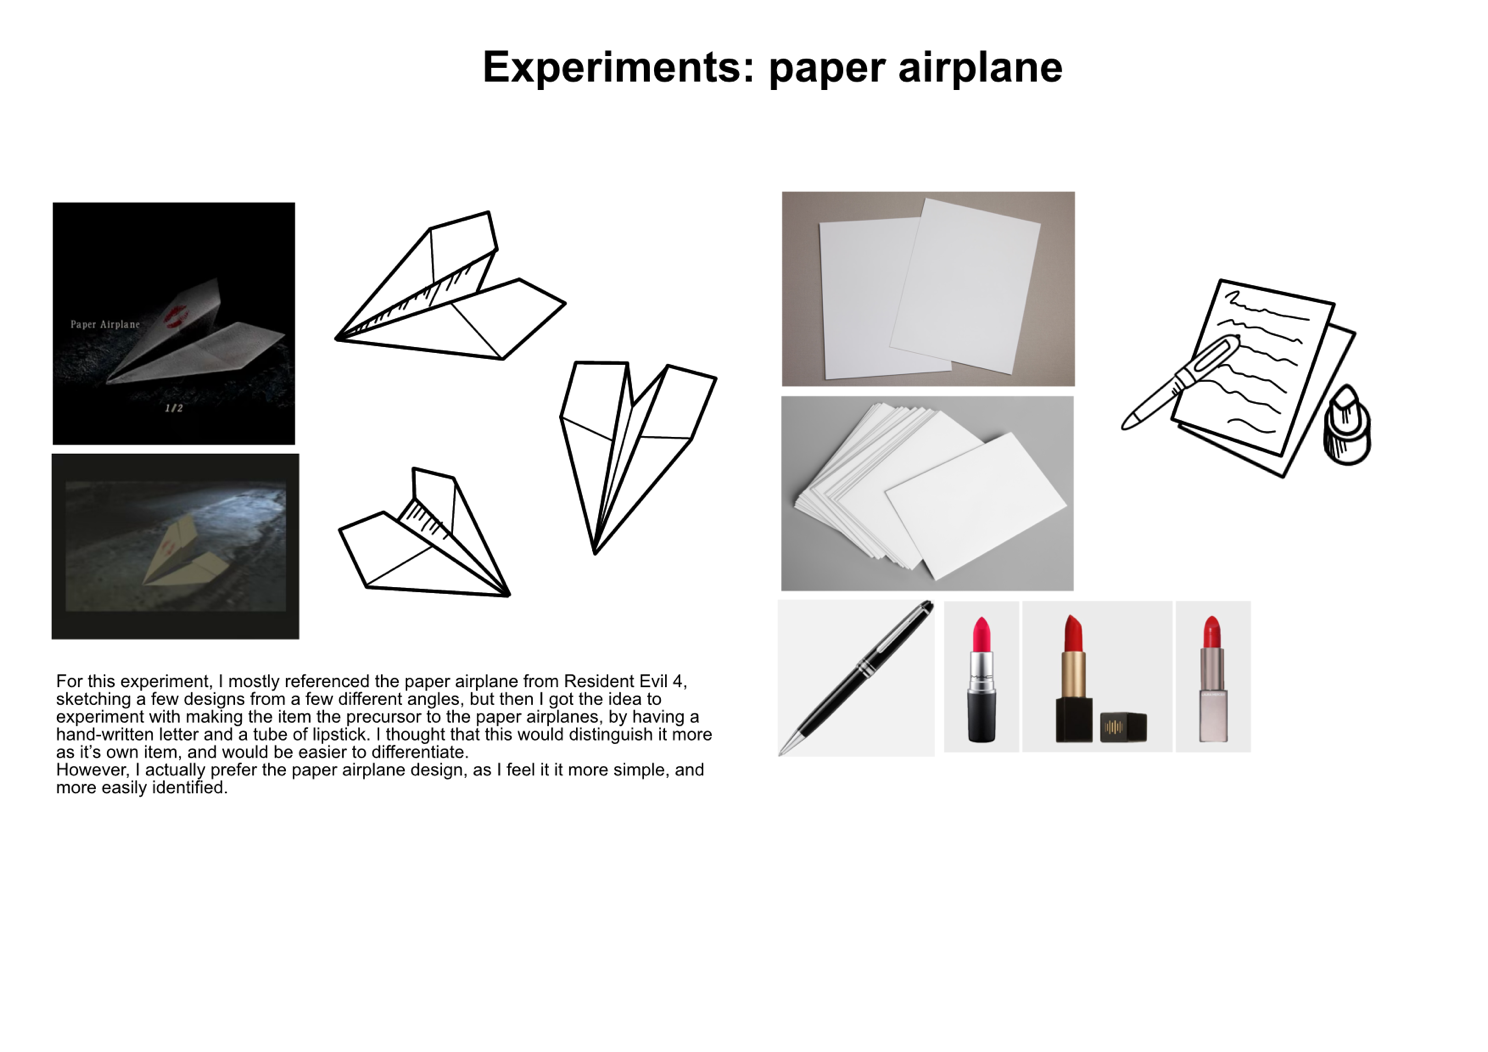
Figure 1.1.2, Paper Airplane Design
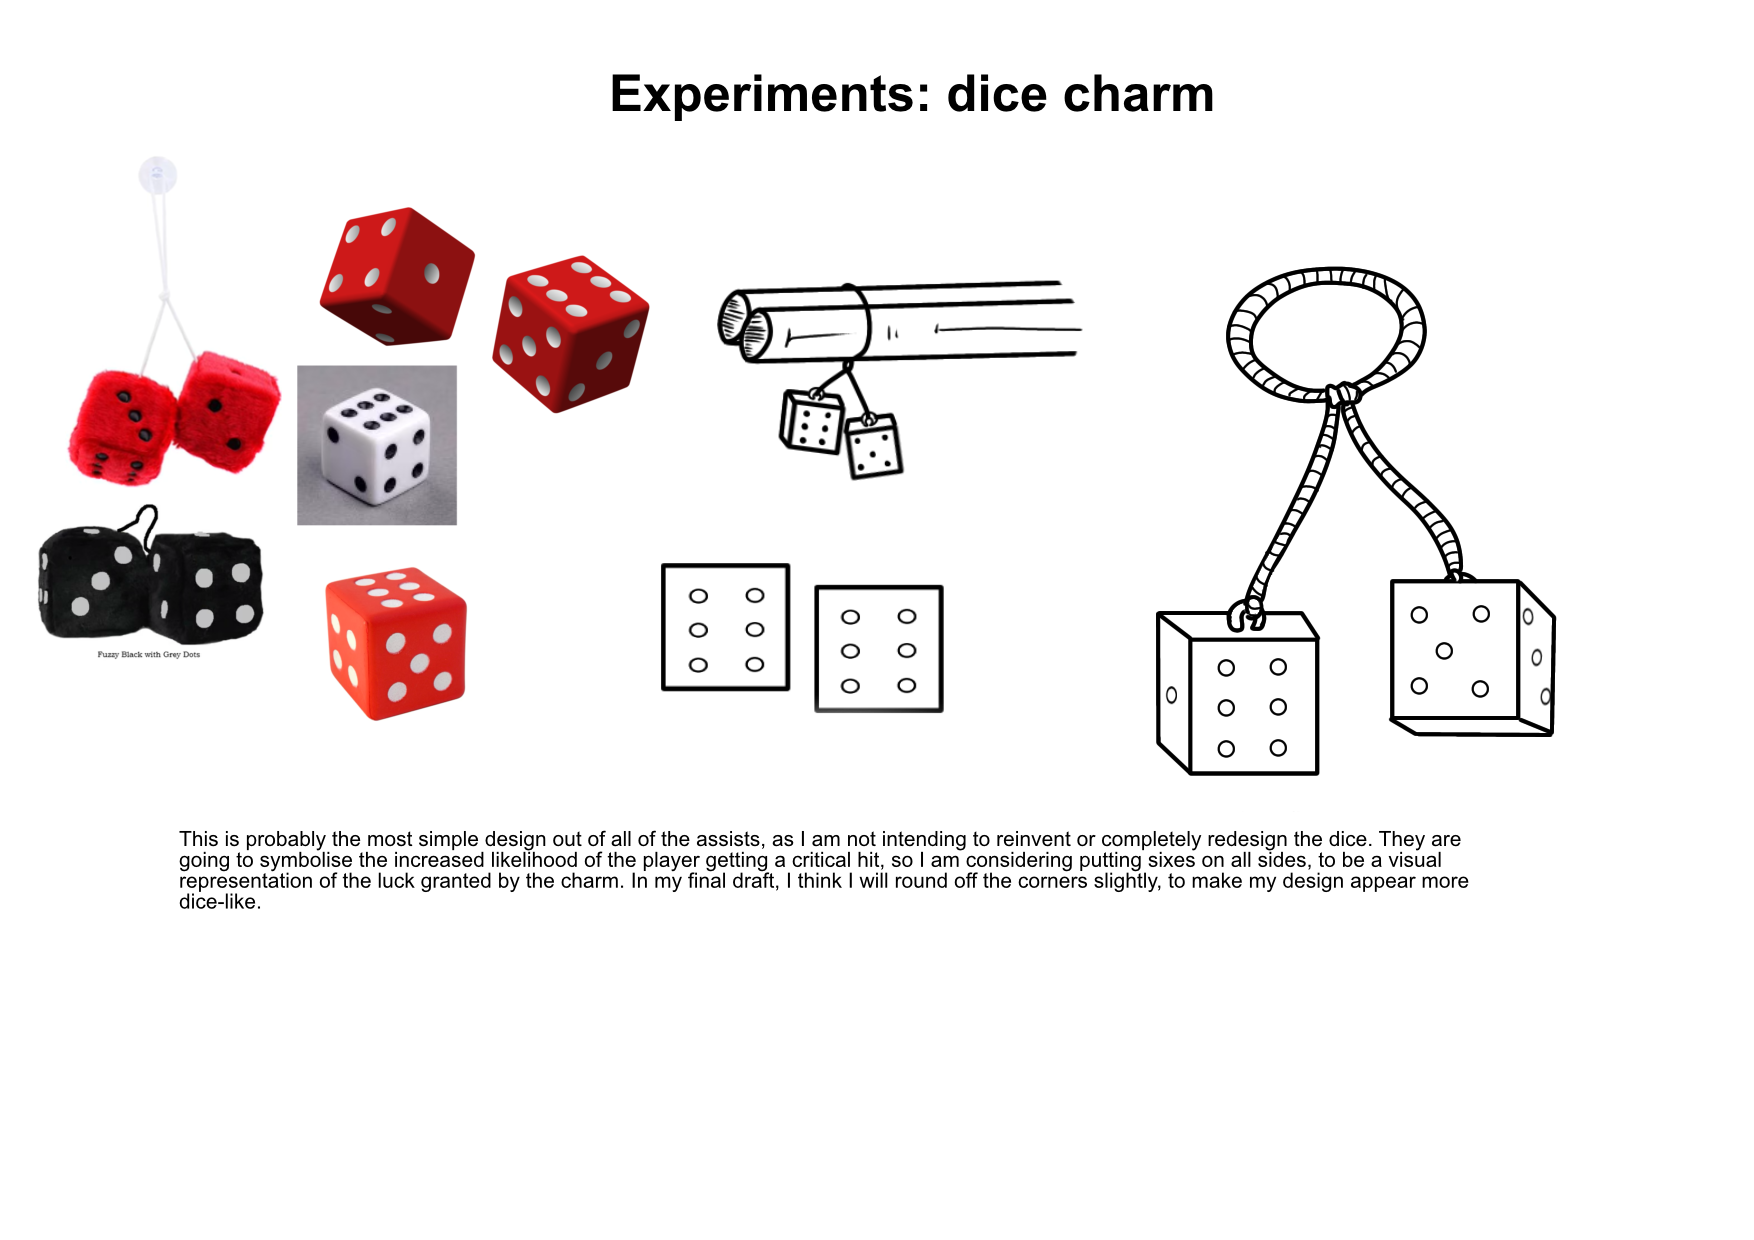
Figure 1.1.3, Dice Charm Design
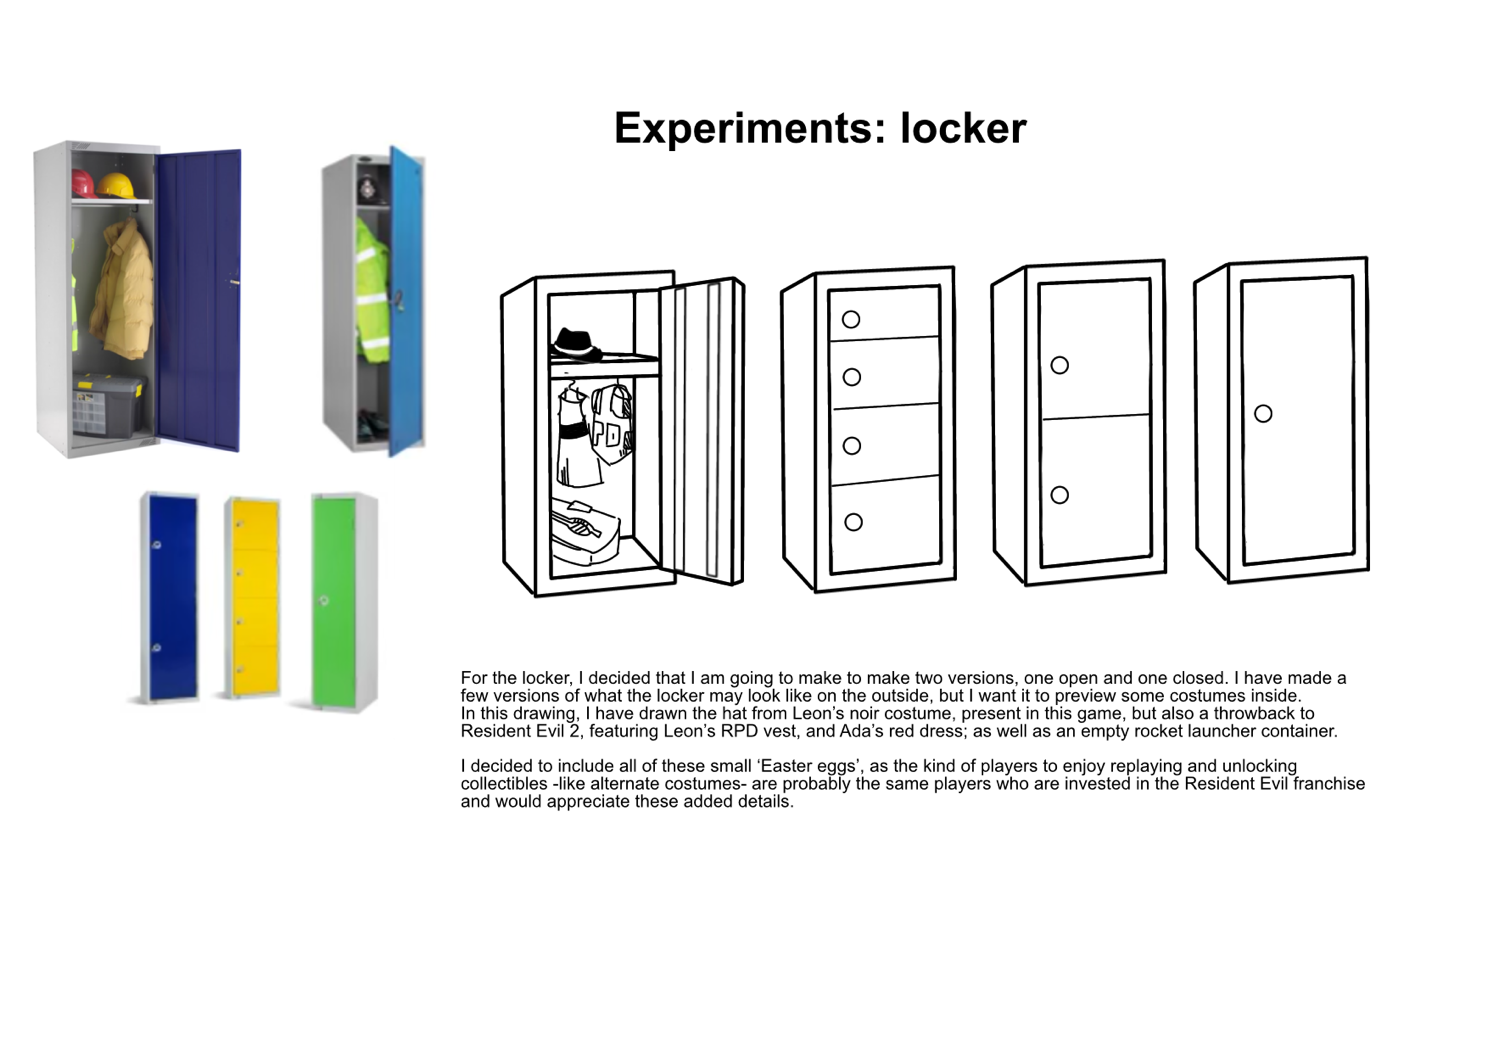
Figure 1.1.4, Locker Design
DESIGN PHASE 1.2
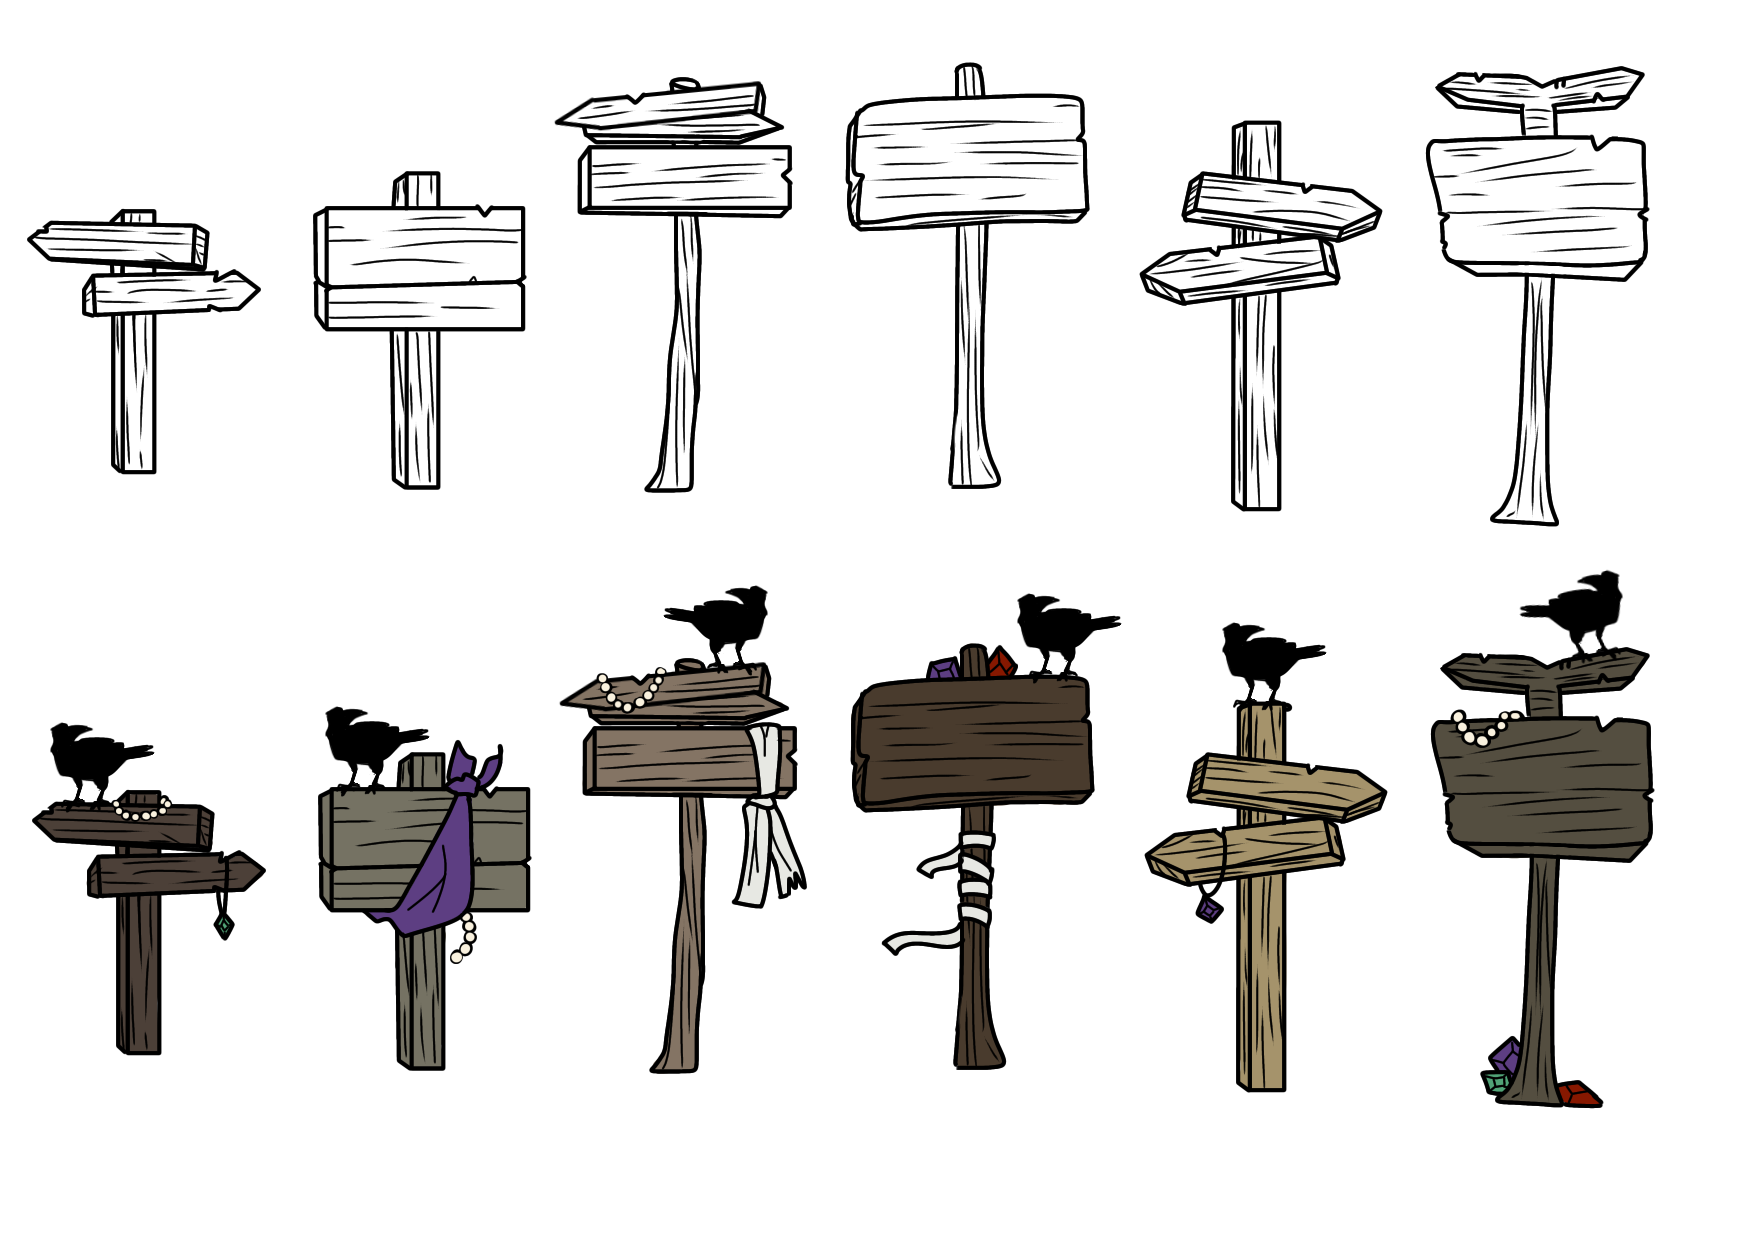
Figure 1.2.1, Sign Post Varients
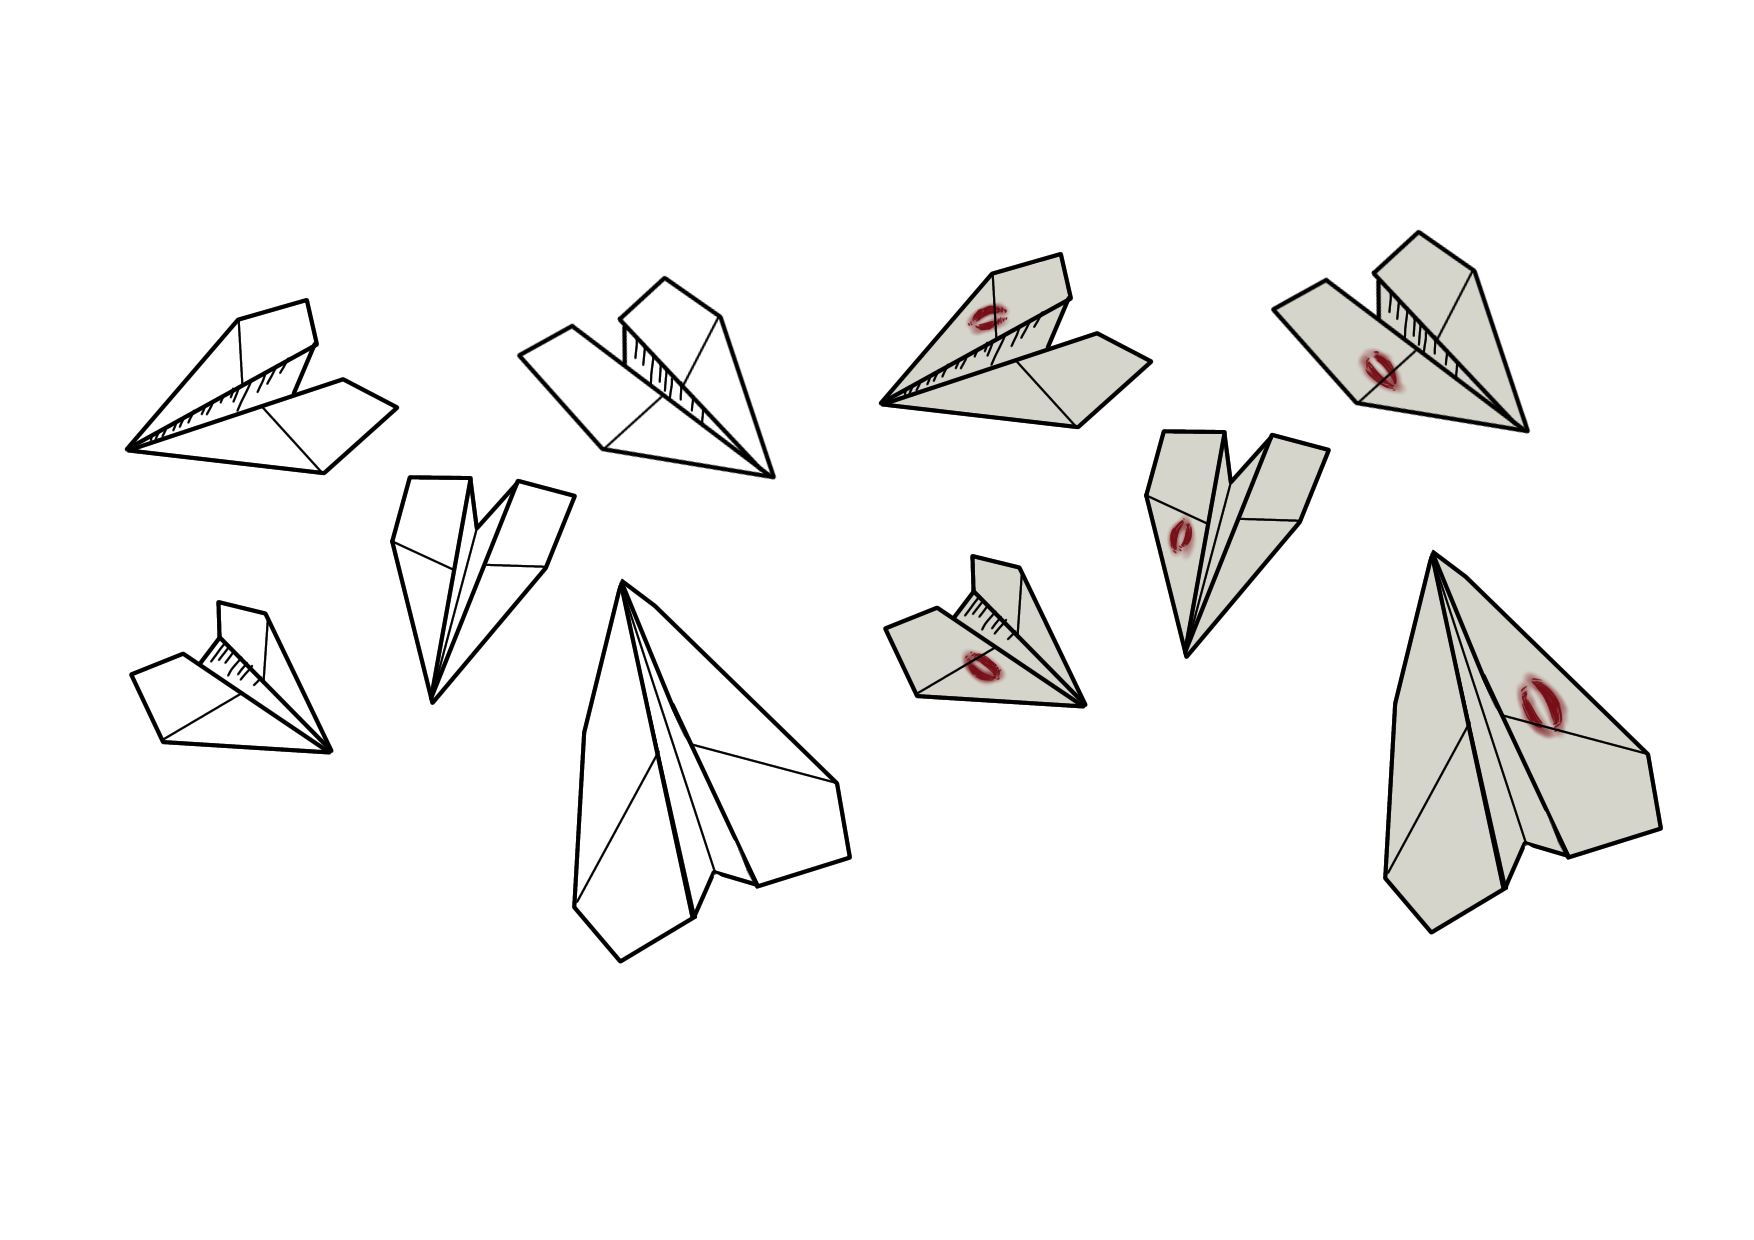
Figure 1.2.2, Airplane Varients
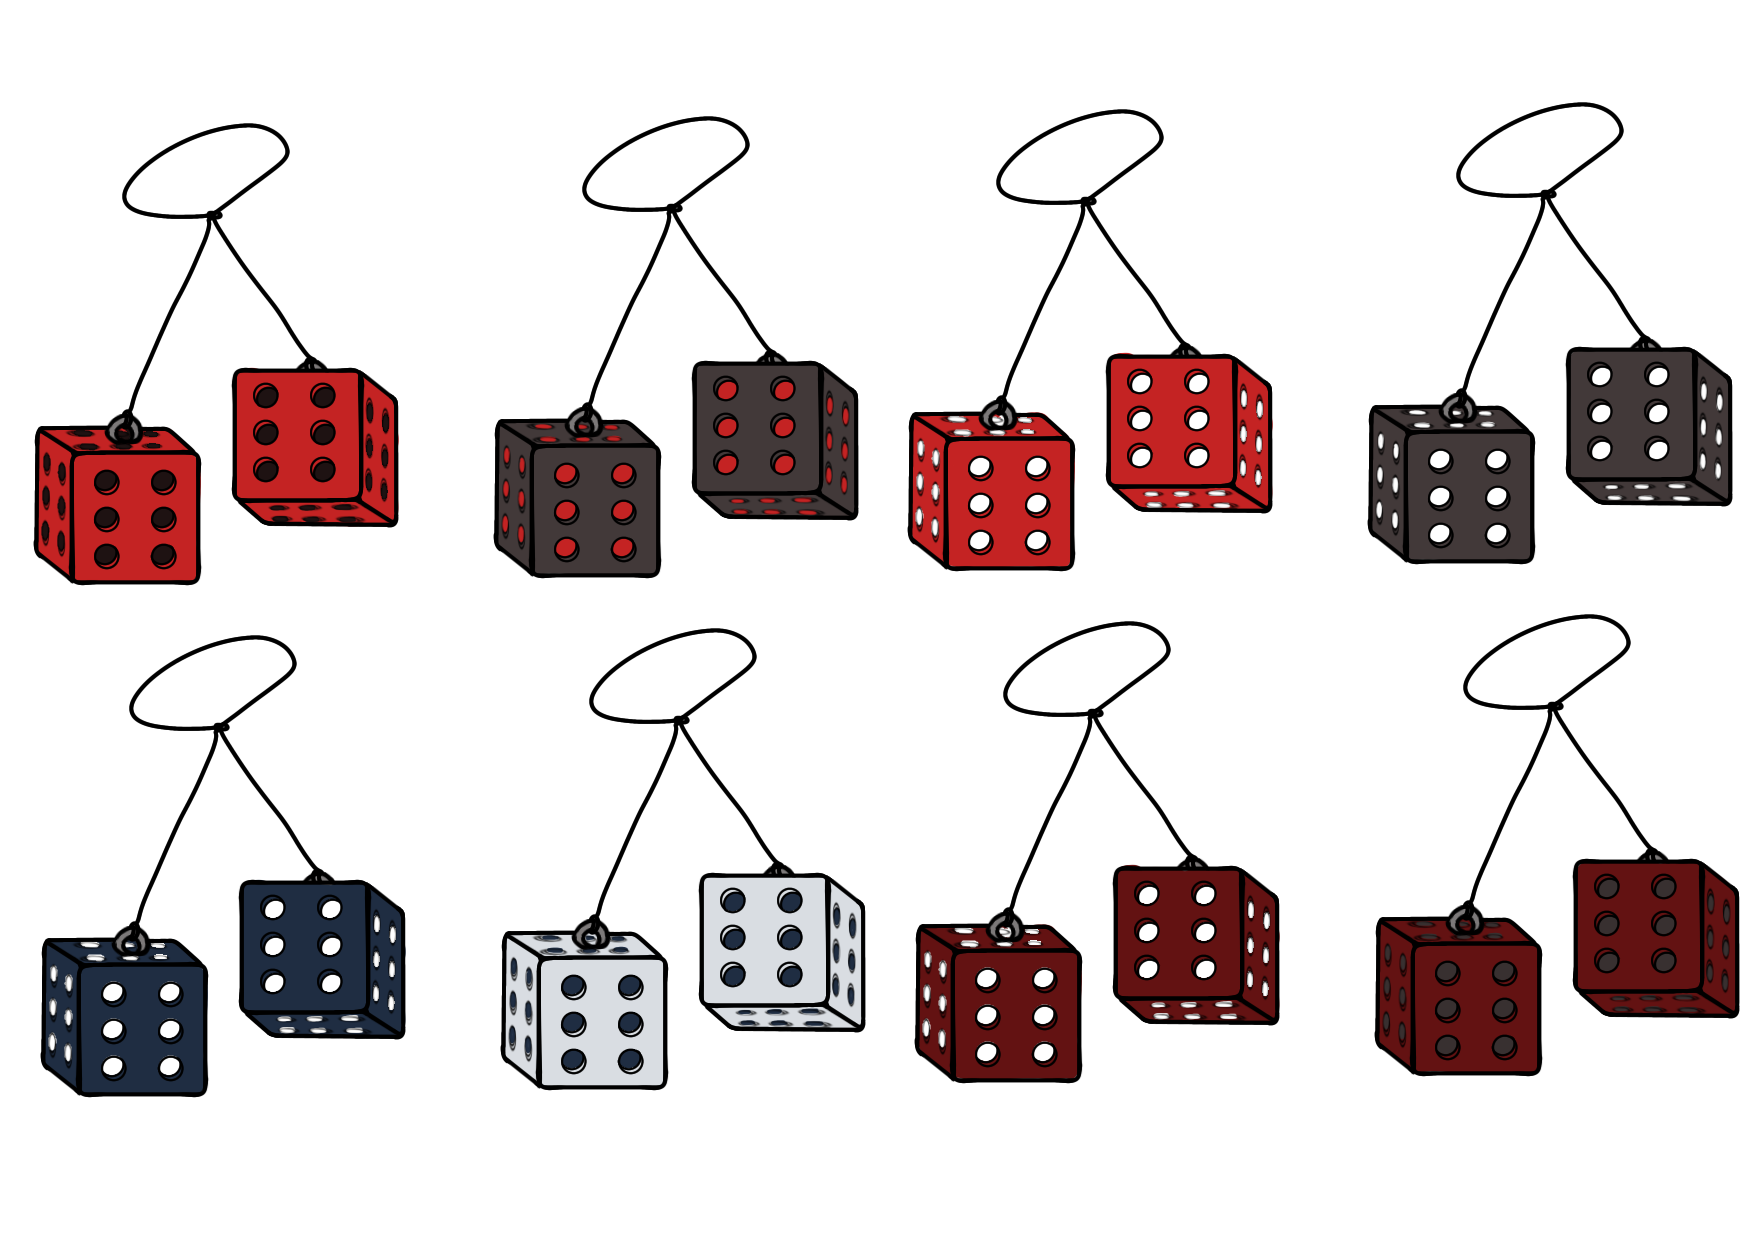
Figure 1.2.3, Dice Varients
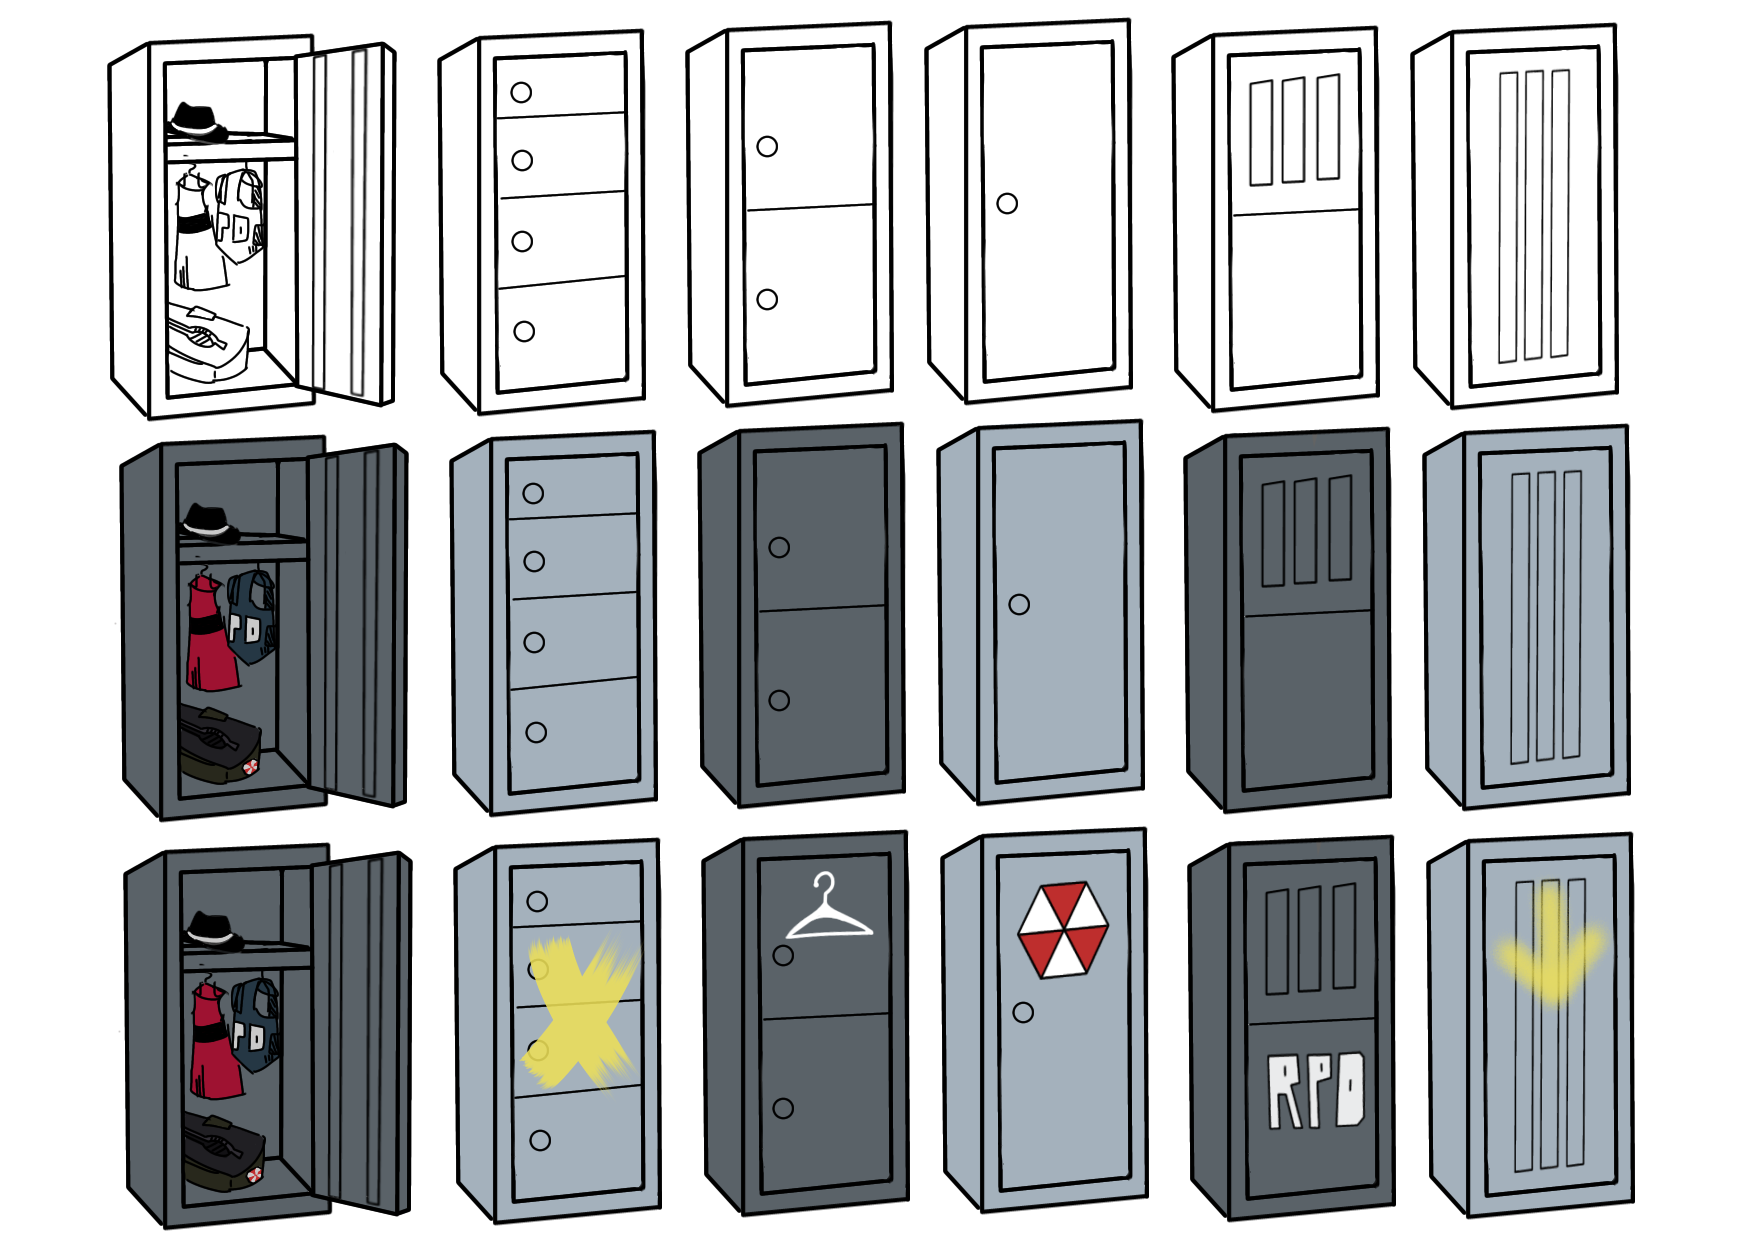
Figure 1.2.4, Locker Varients
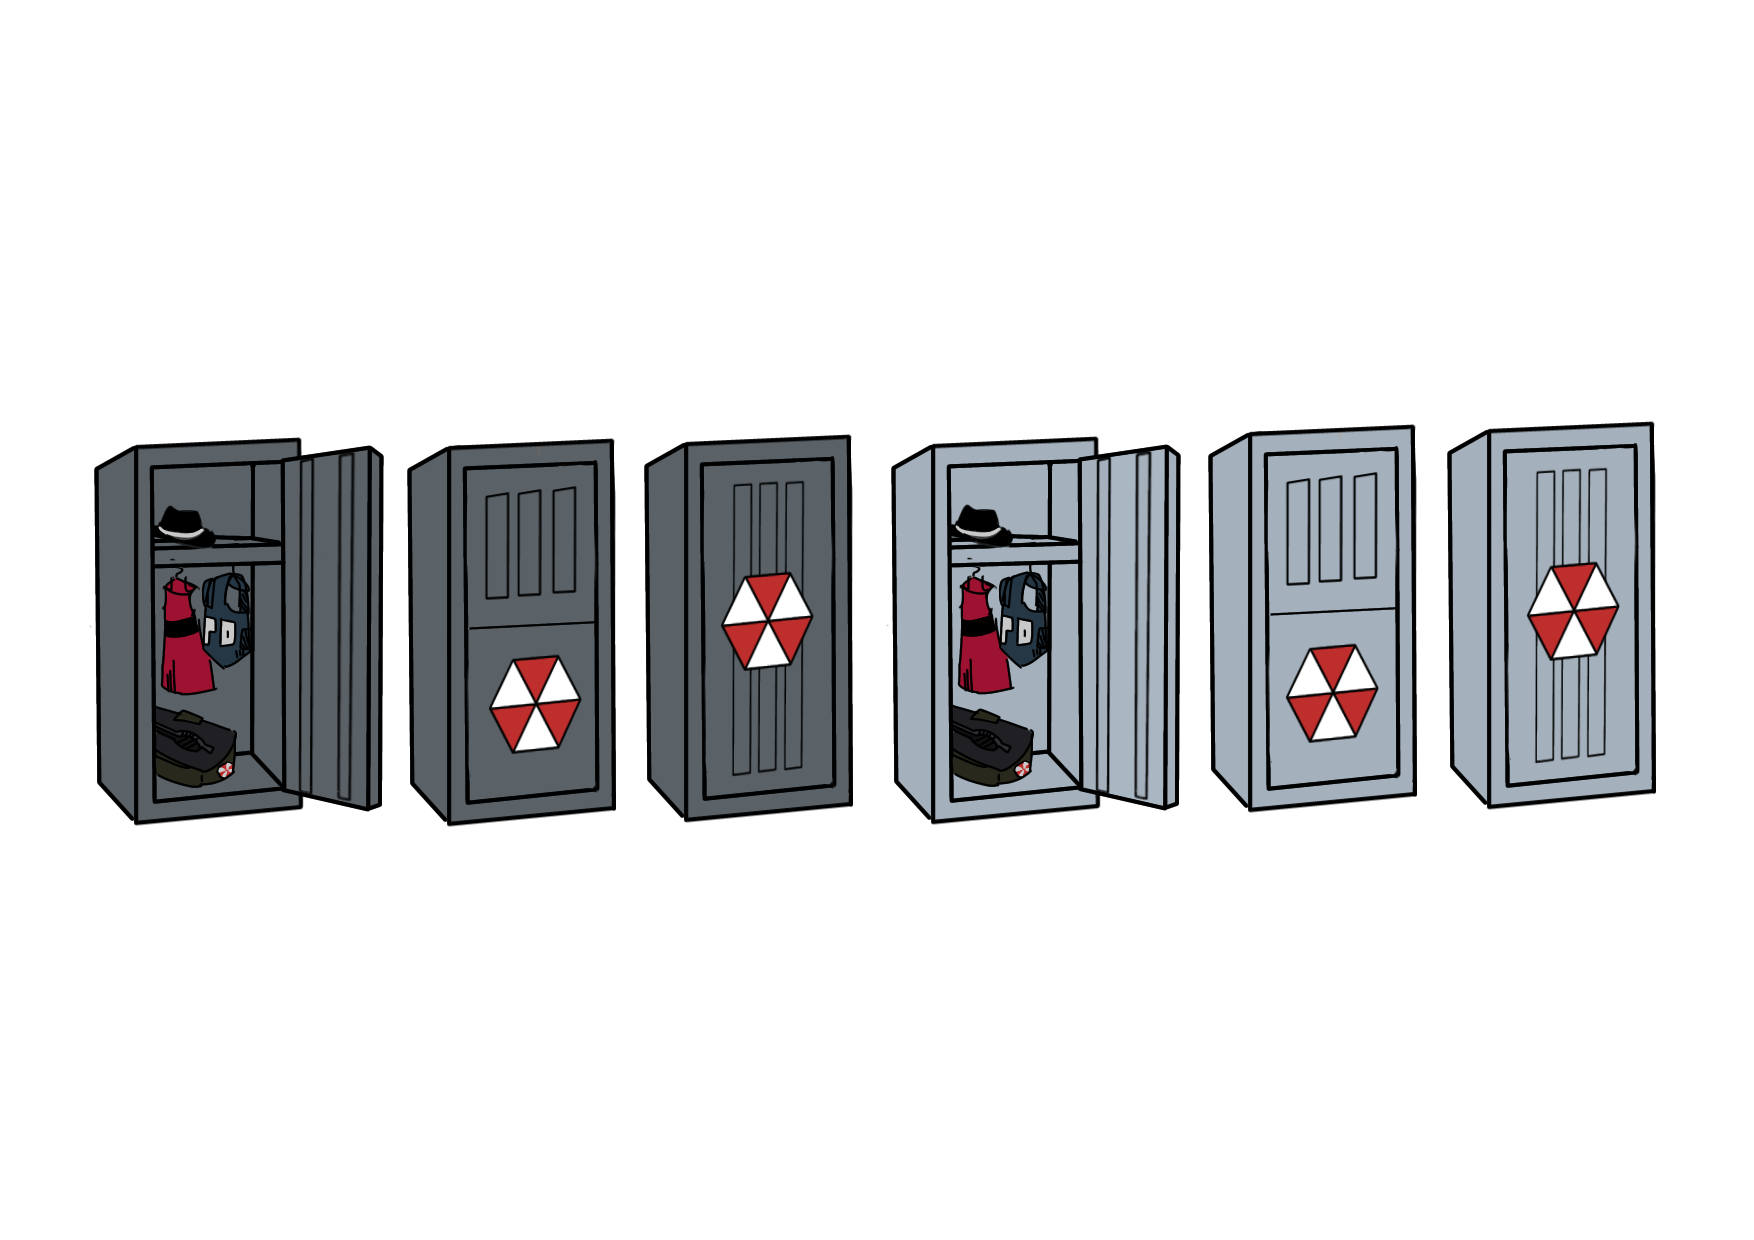
Figure 1.2.5, More Locker Varients
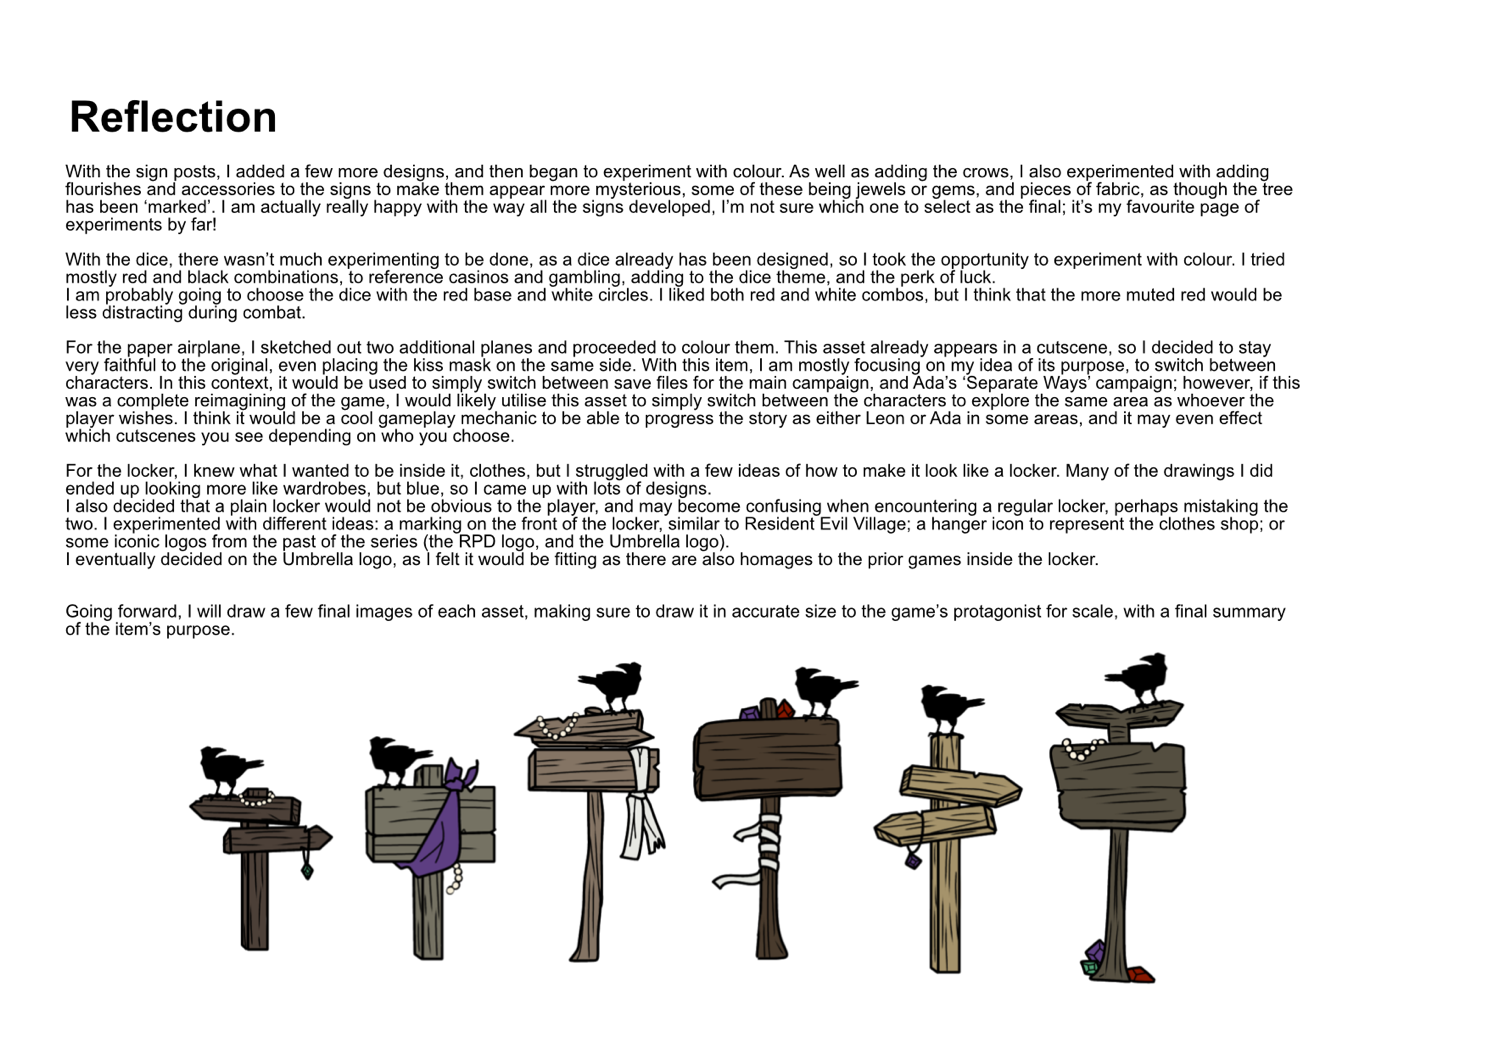
Figure 1.2.6, Reflection
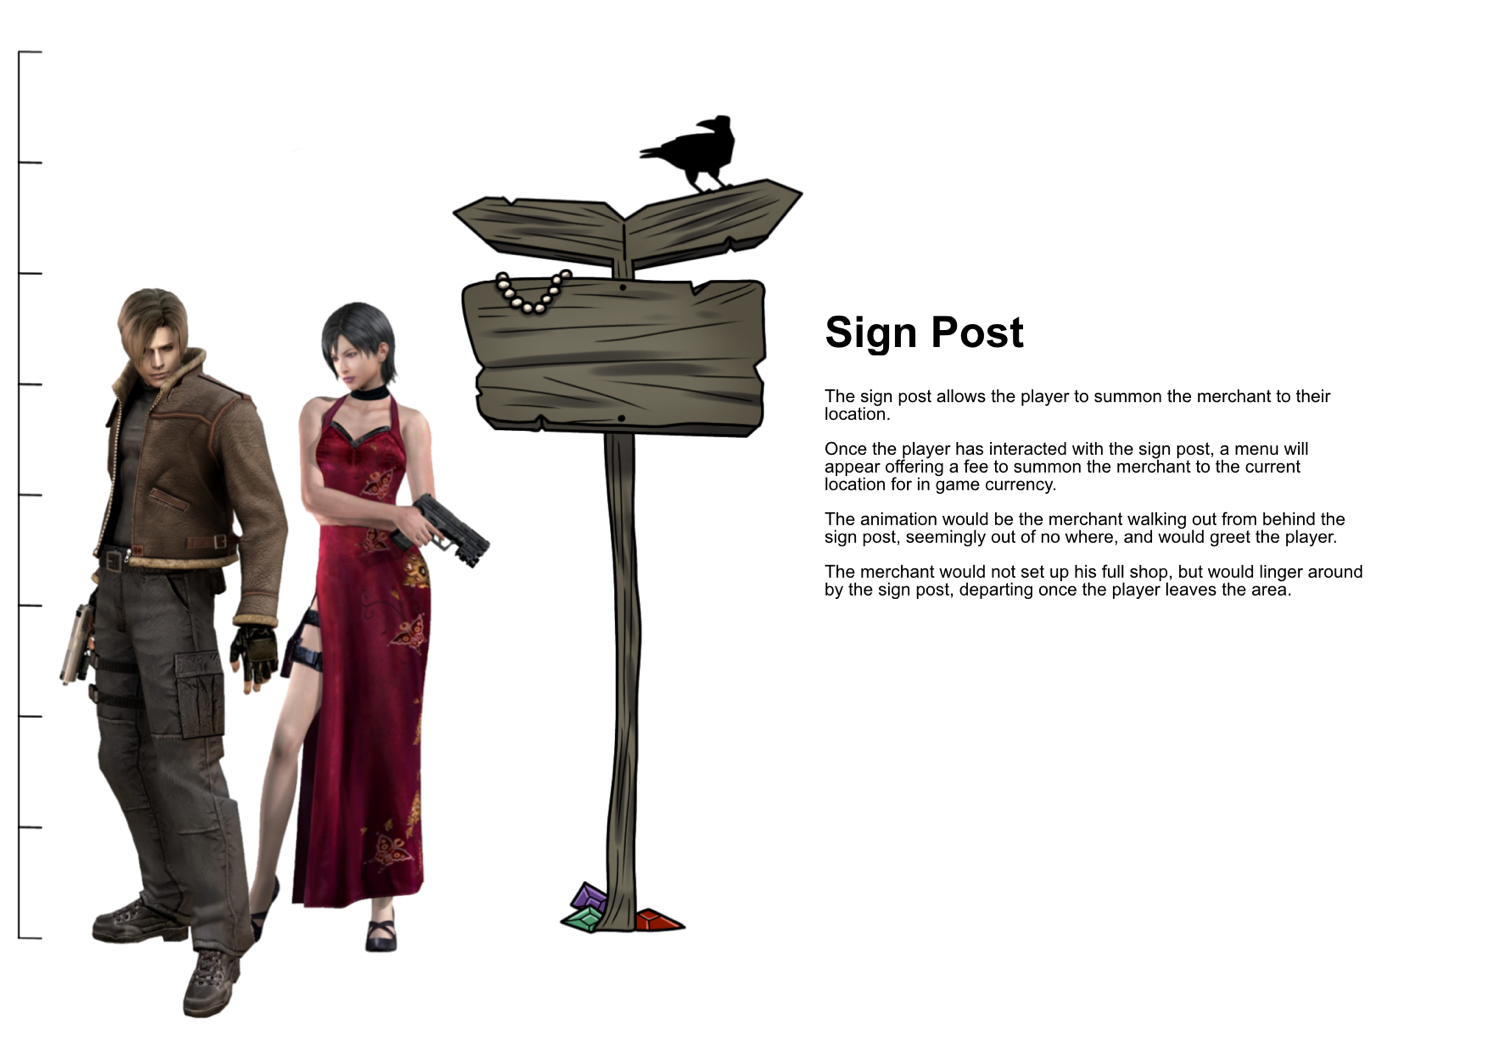
Figure 1.2.7, Sign Post Description
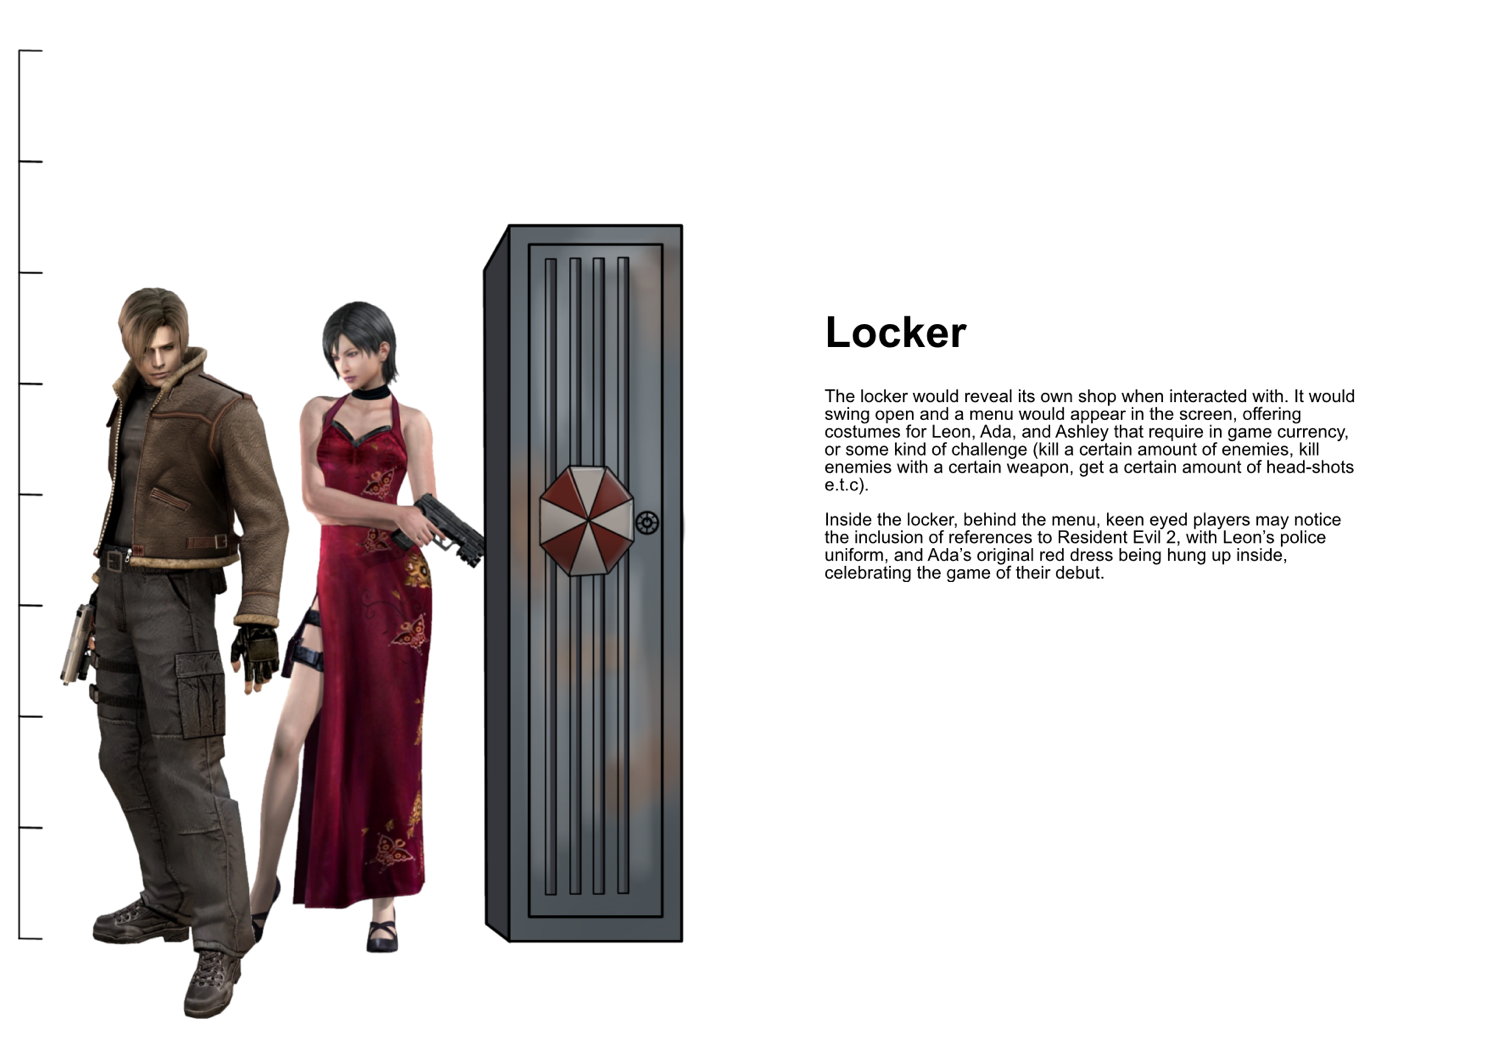
Figure 1.2.8, Locker Description
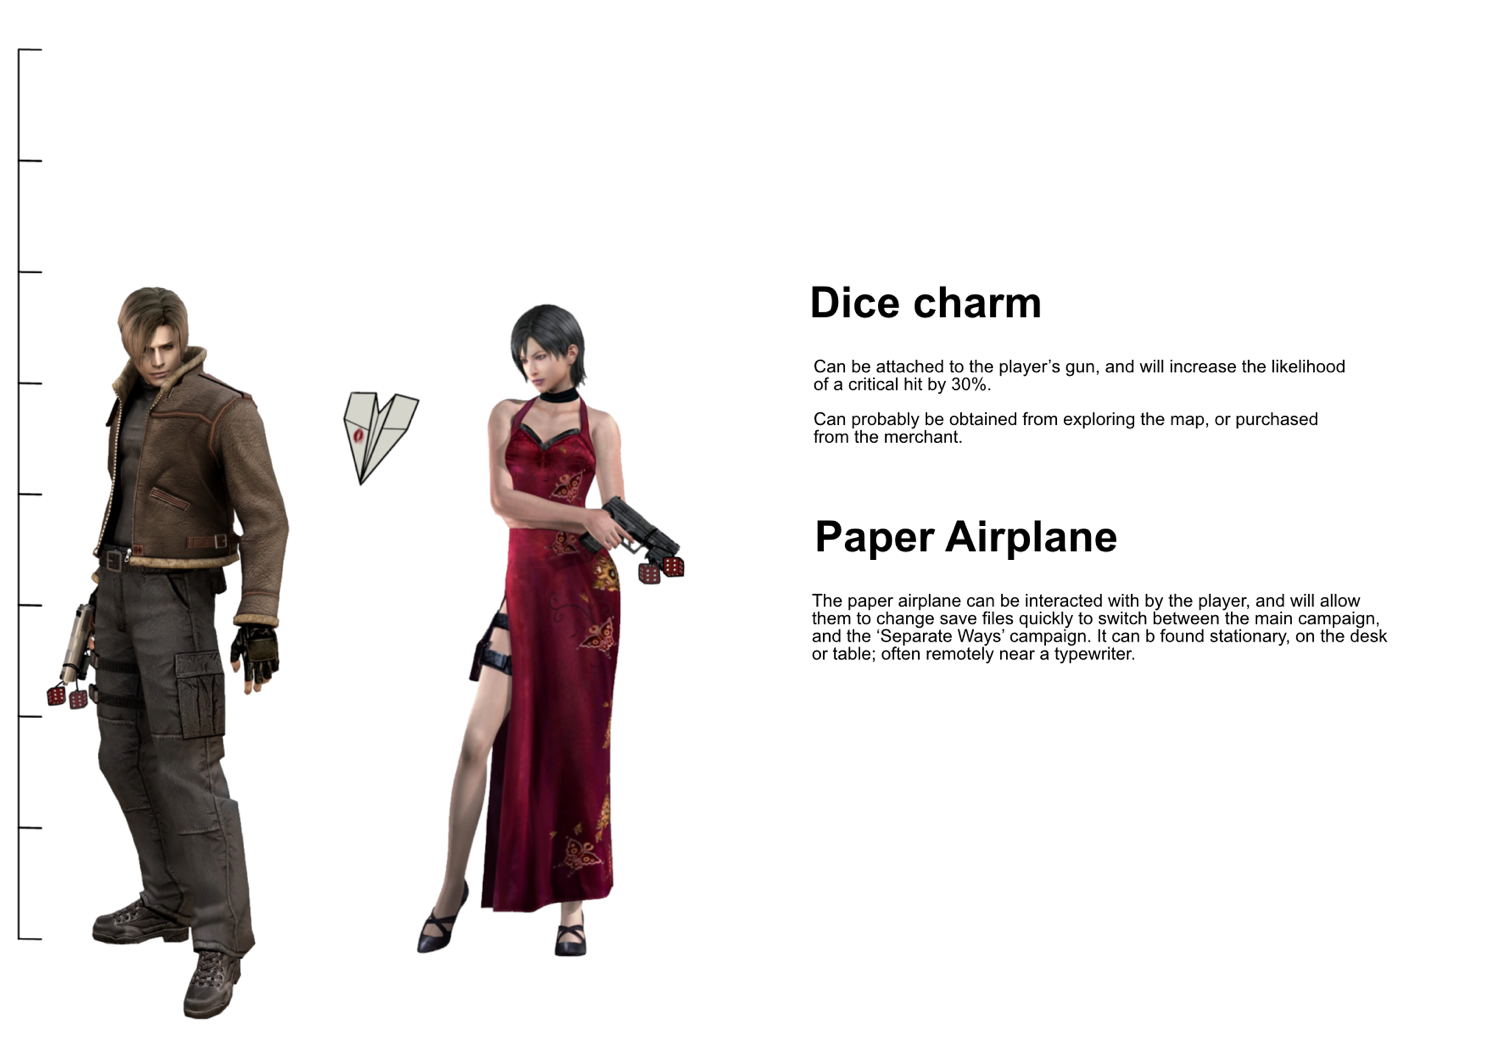
Figure 1.2.9, Dice and Airplane Description
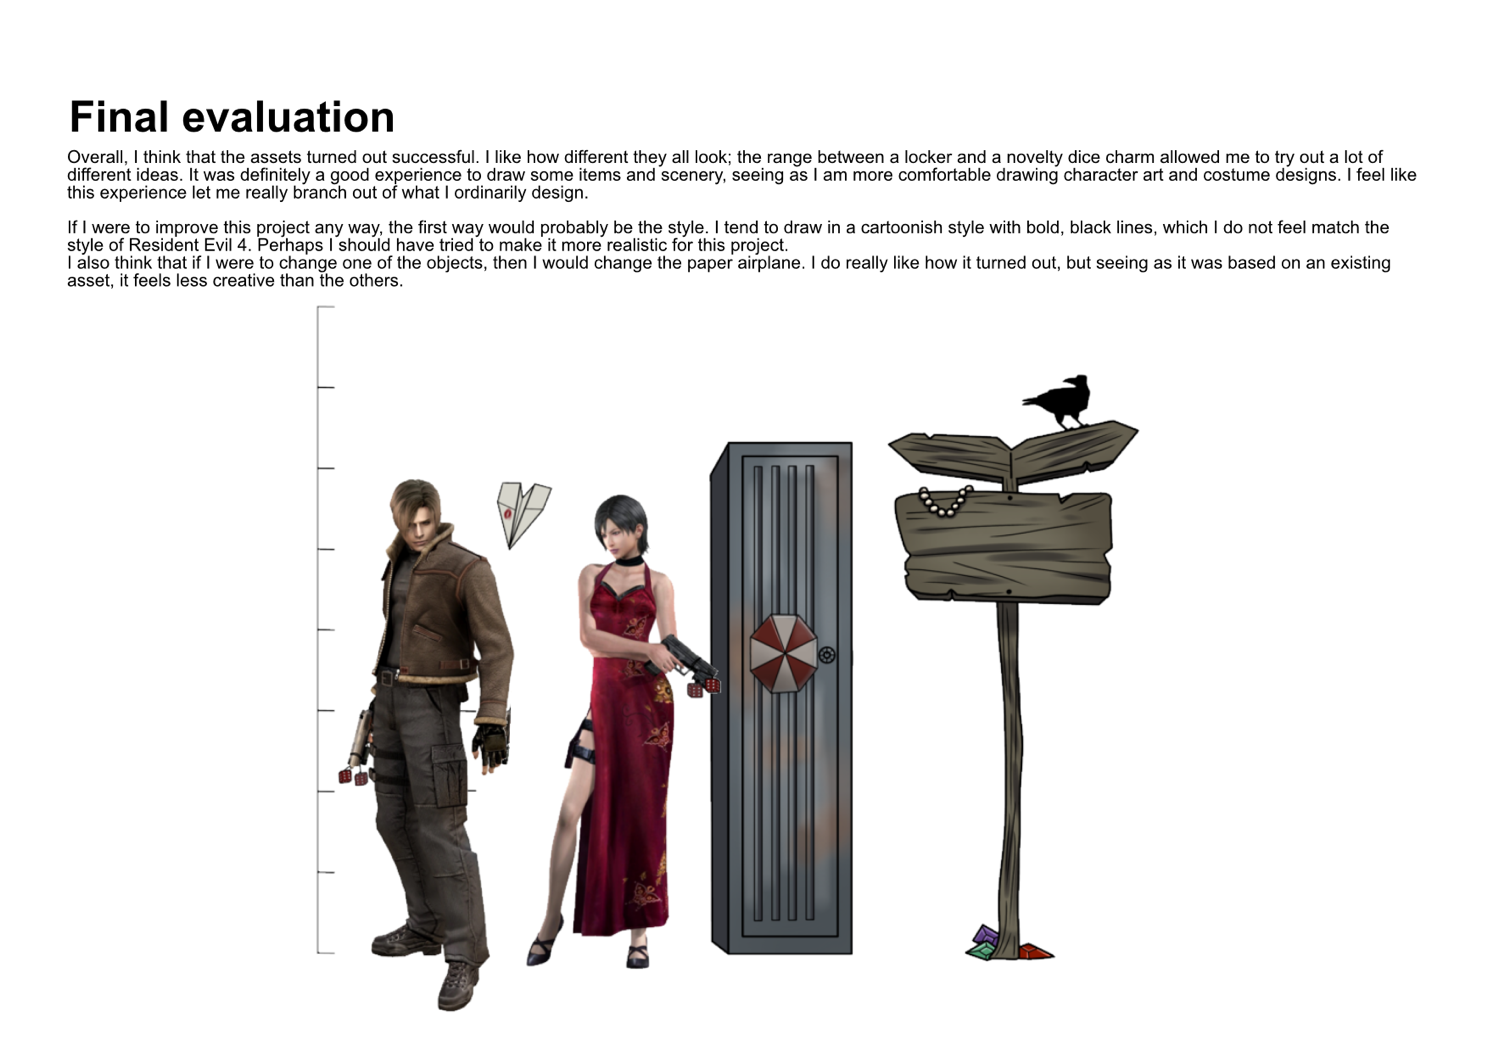
Figure 1.2.10, Final Evaluation
RESEARCH 2.0
The next step for the project was reseacrh, so I loaded up the game and ran some tests and gathered some samples.
During my research, I focused my attention to mostly animations and heights, two aspects I need to consider when
creating these assets.
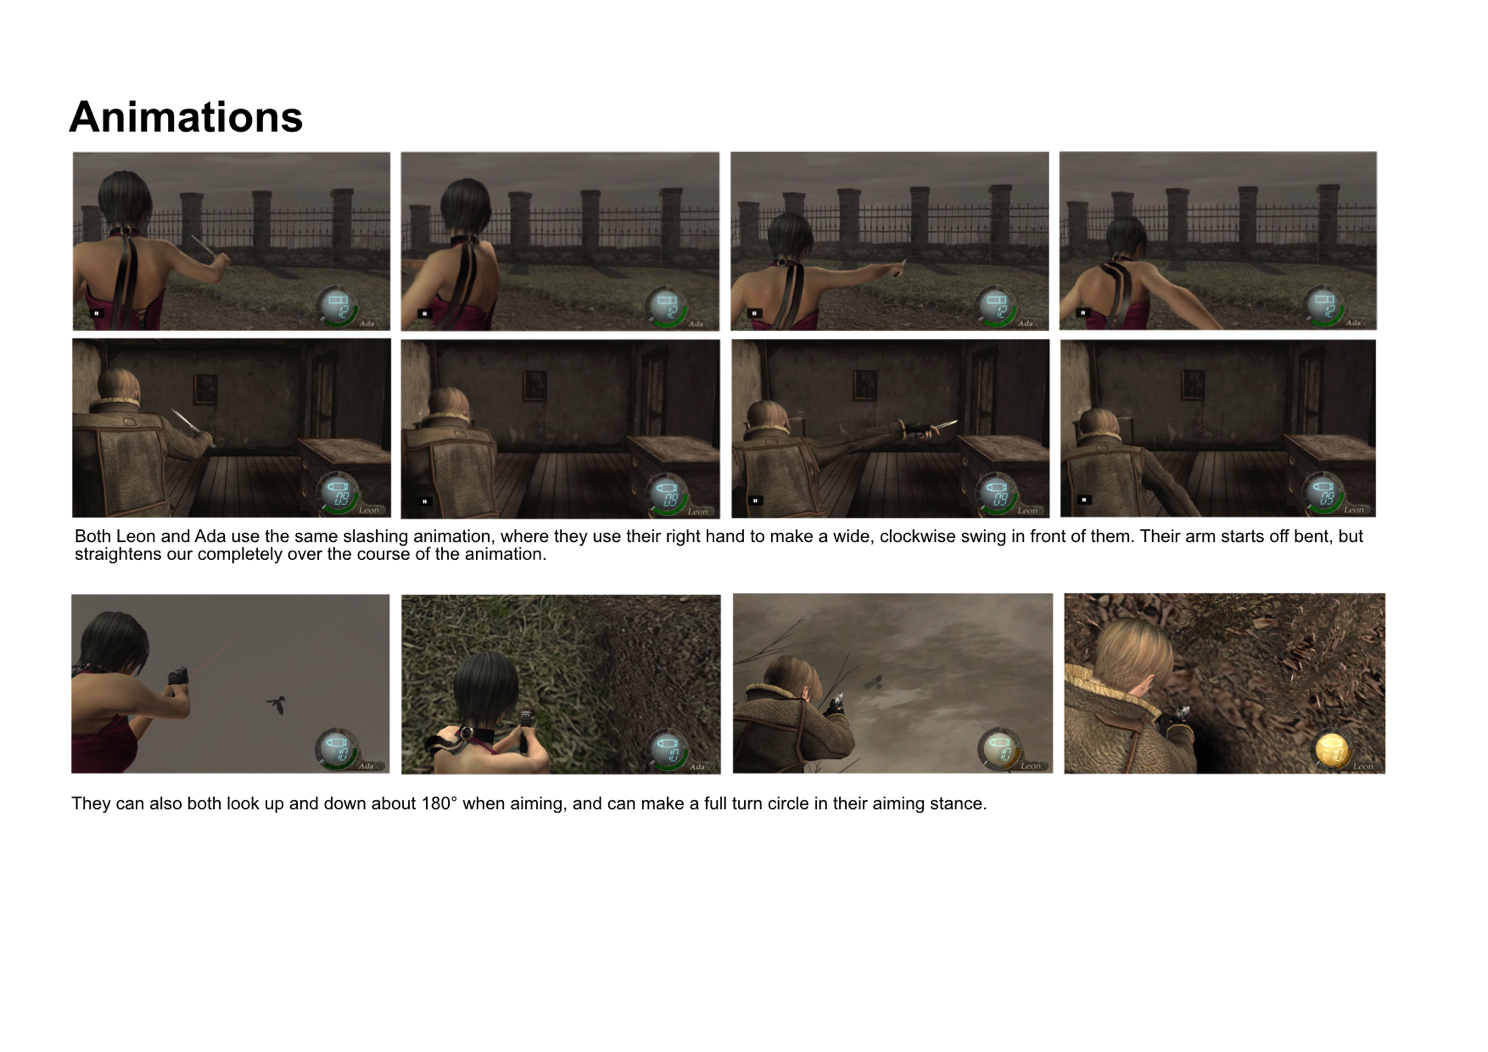
Figure 2.0.1, Animations Research
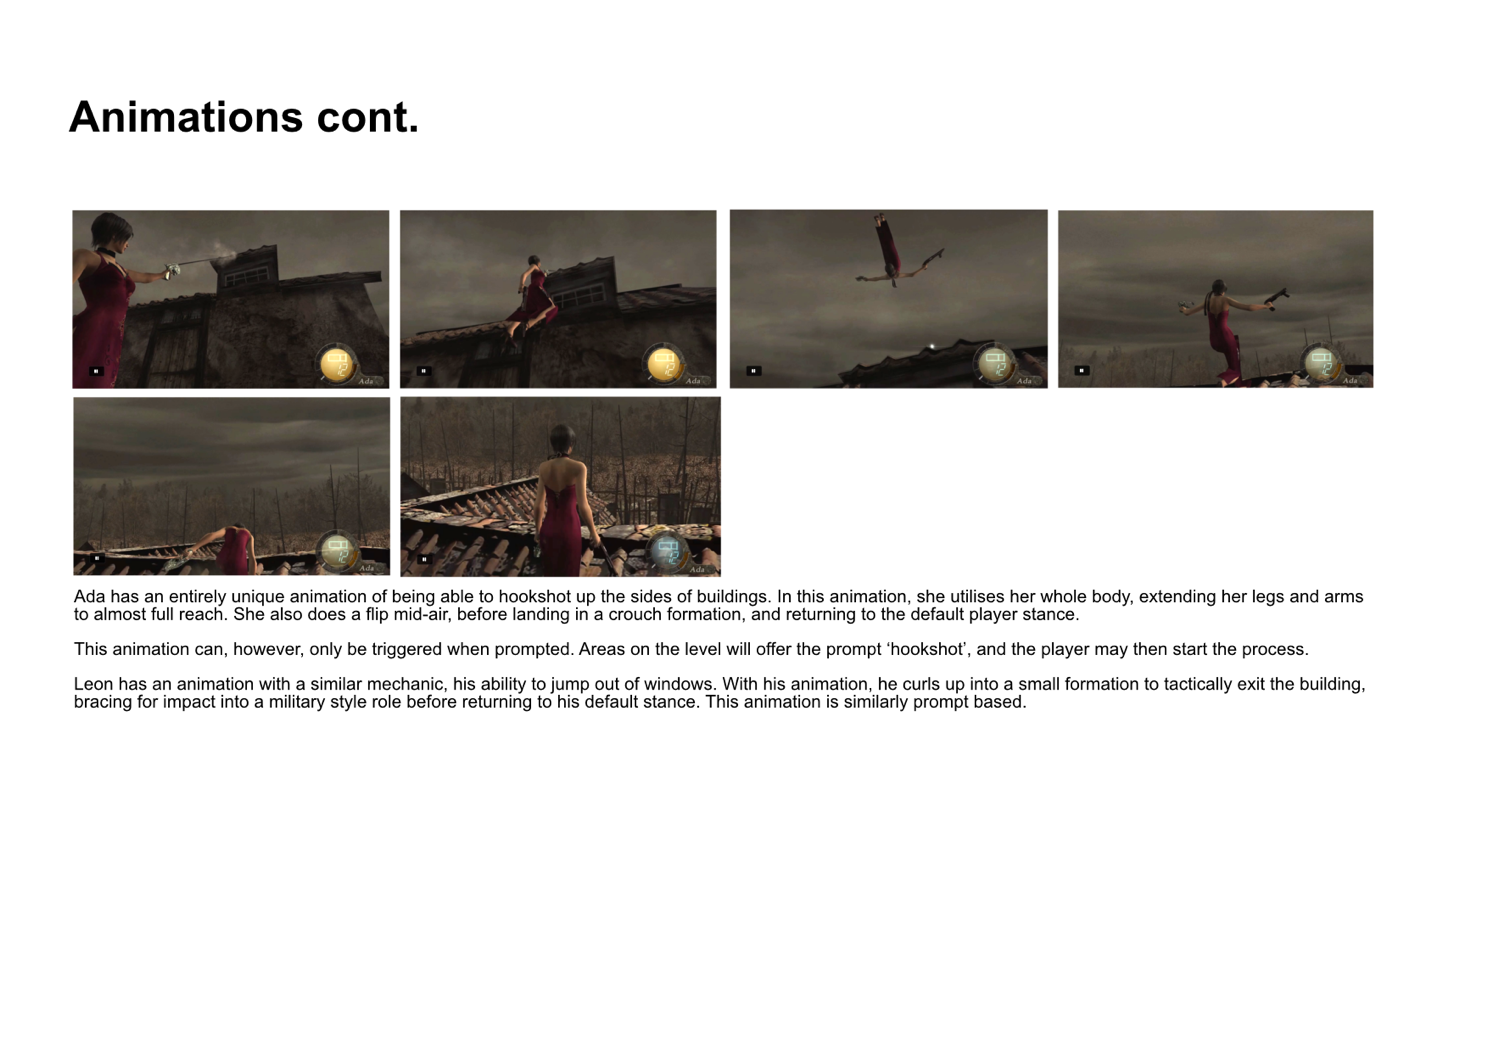
Figure 2.0.2, Animations Research Cont.
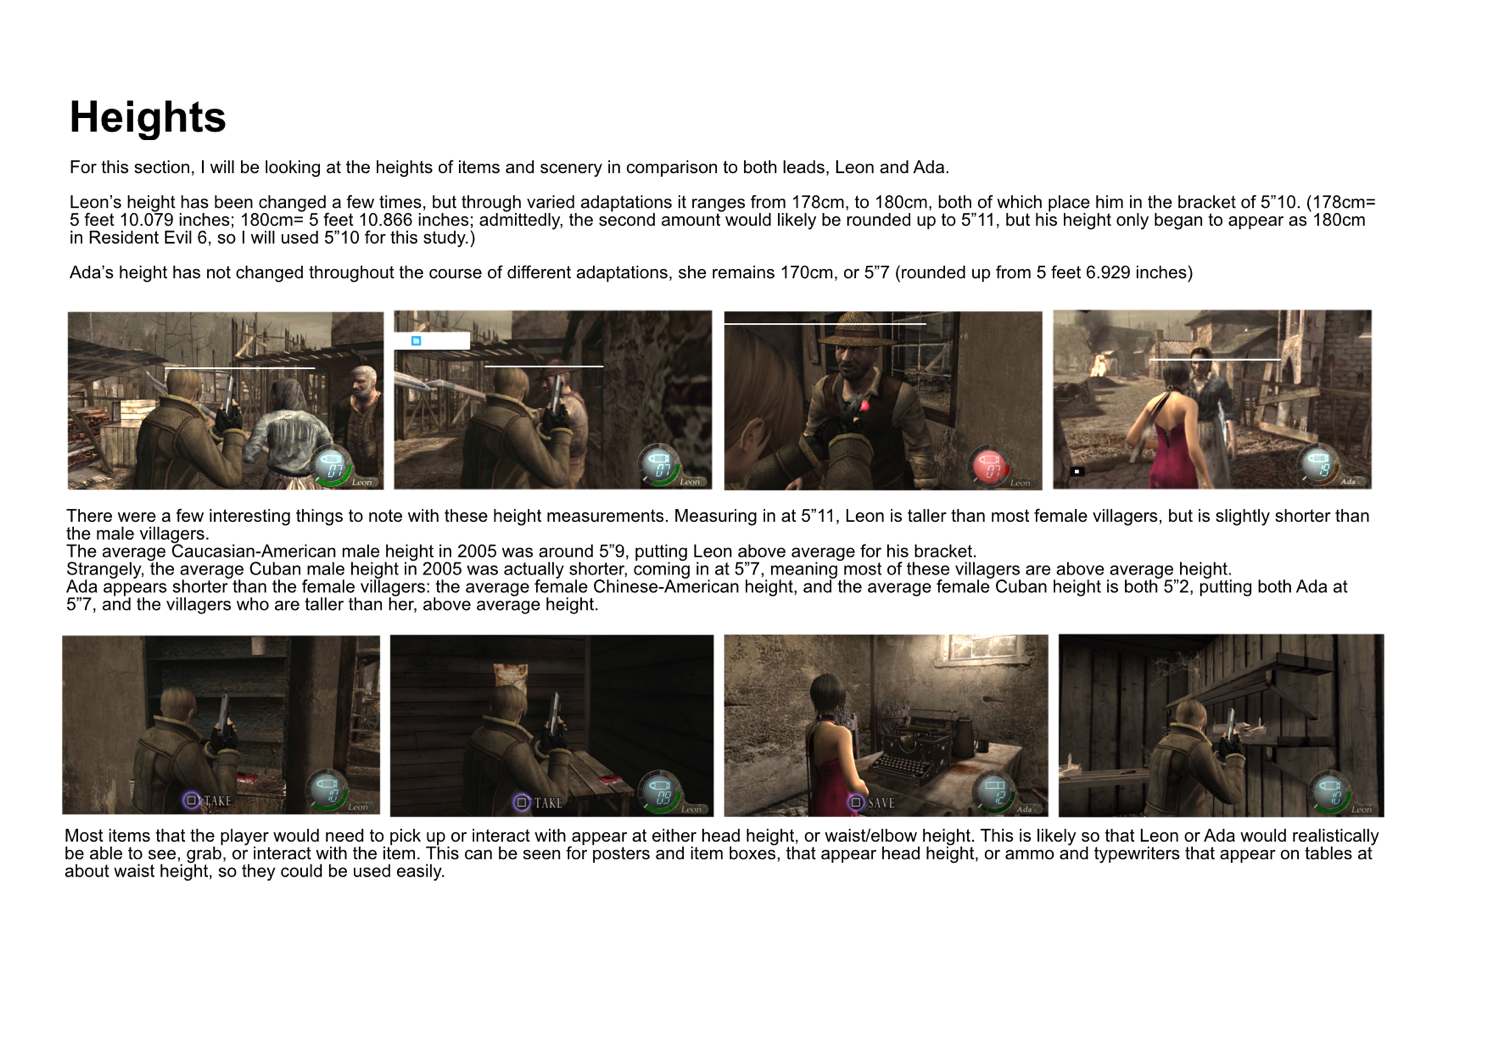
Figure 2.0.3, Heights Research
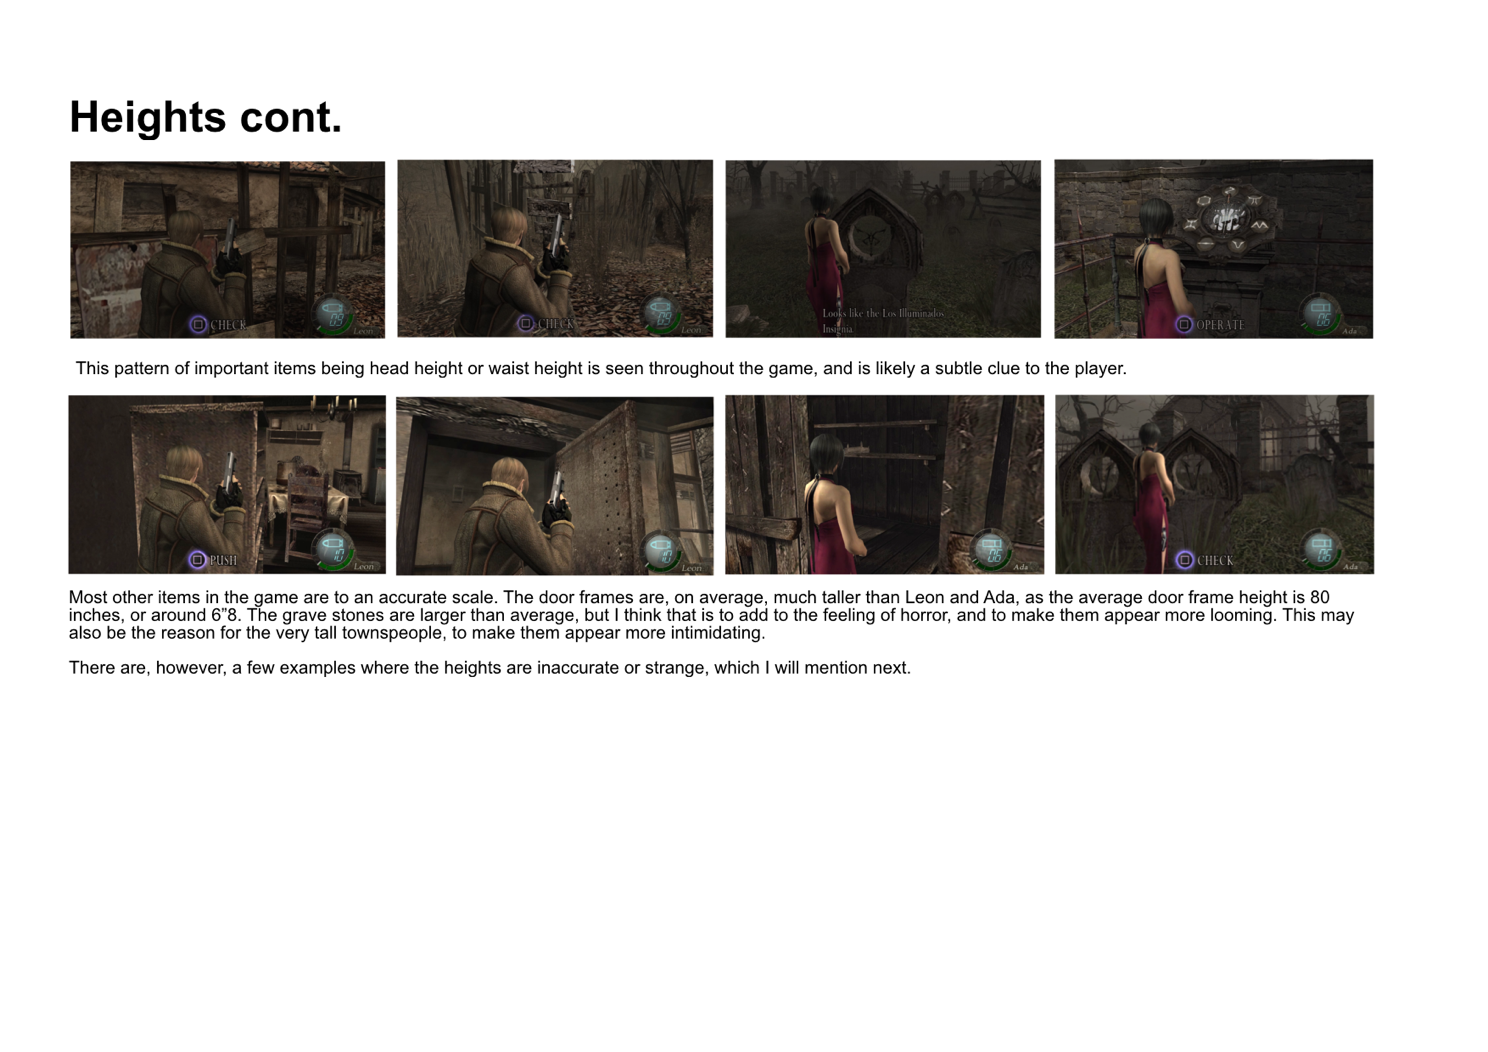
Figure 2.0.4, Heights Research Cont.
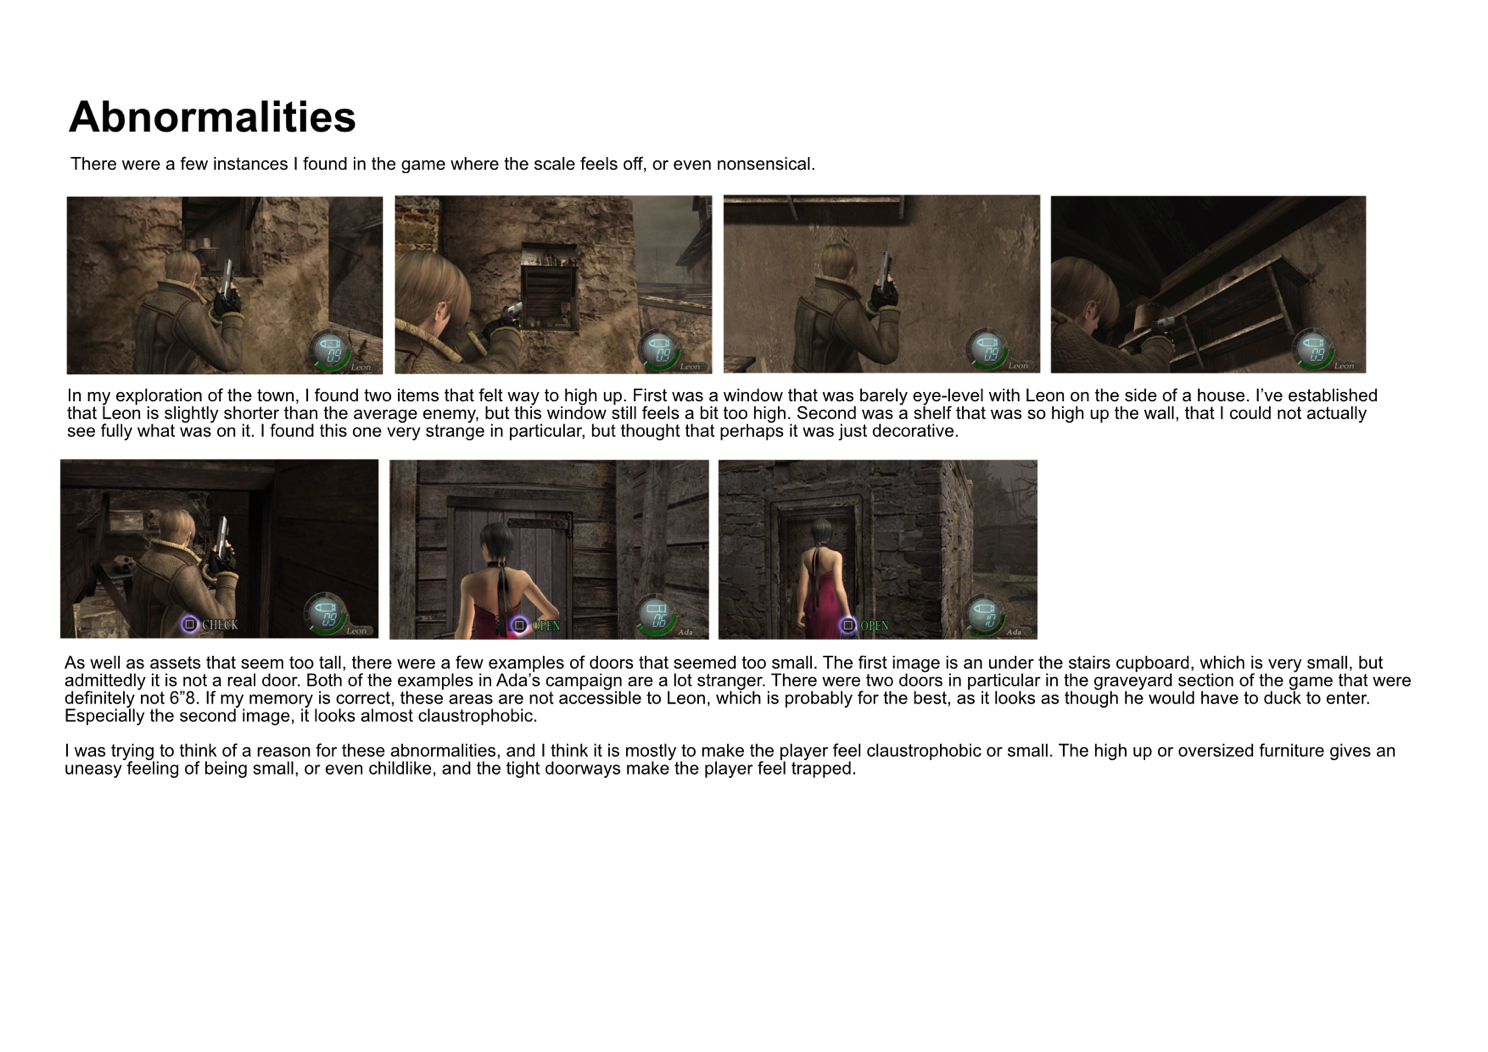
Figure 2.0.5, Abnormalities Research
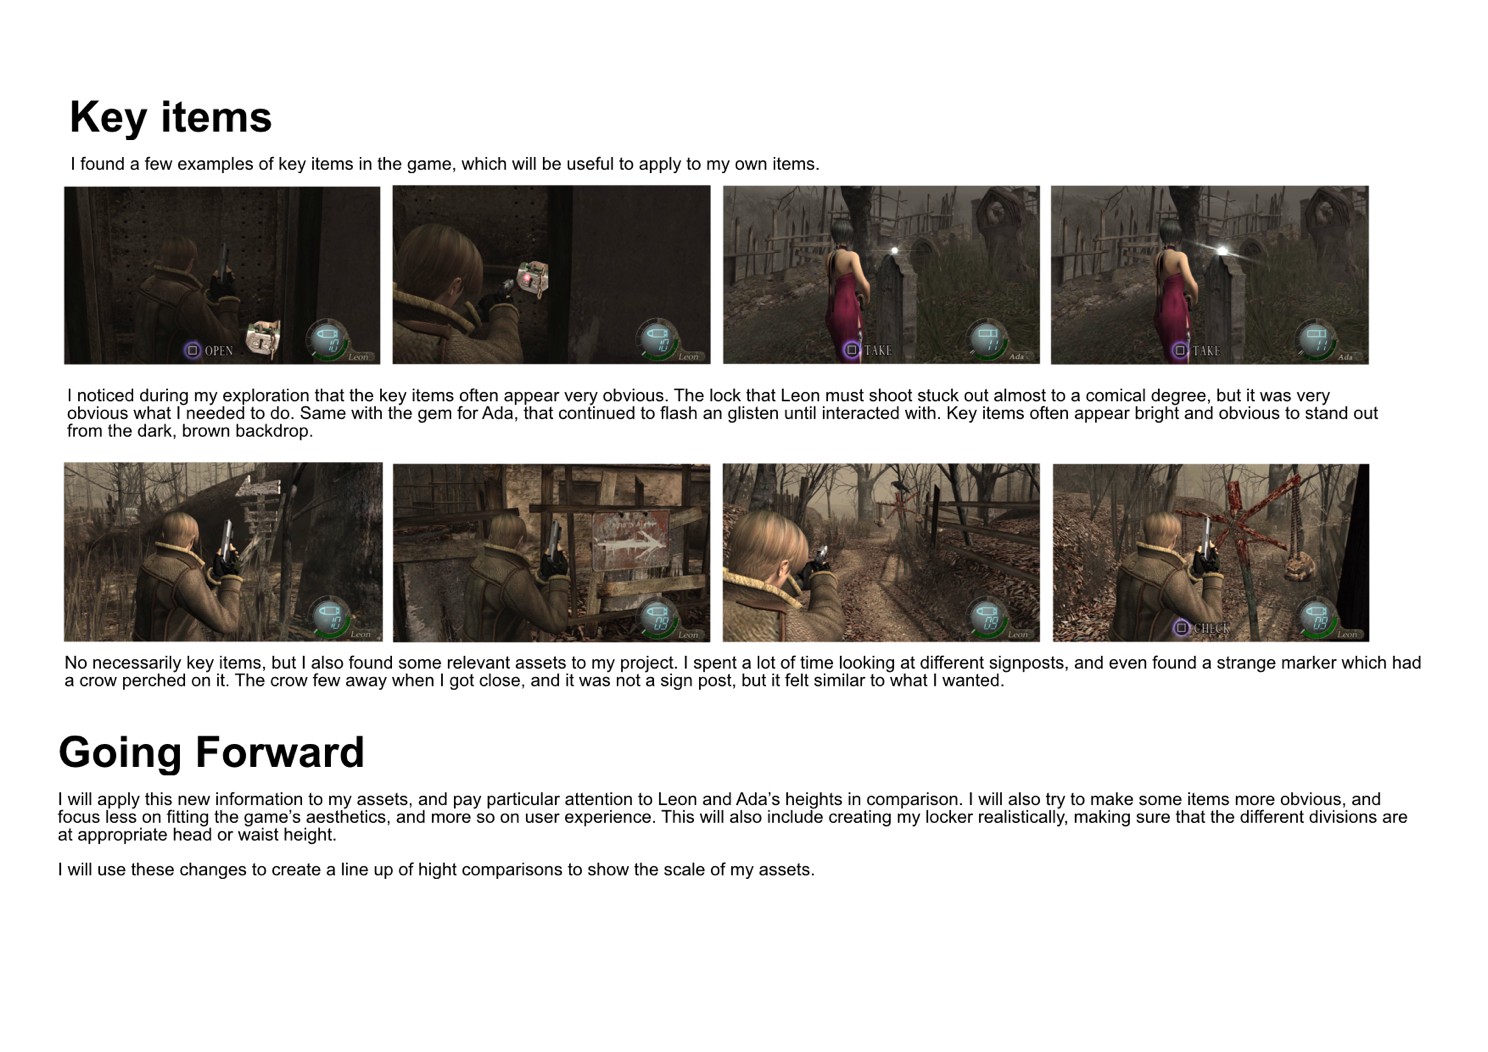
Figure 2.0.6, Key Items Research
HEIGHTS 2.1
Using my research, I applied what I had learned to my designs. To do so, I redrew my locker,
appropriately changing the shelves to match the two heights that I had observed in the
game: head height and elbow height. Once I had finished this, I created a line up to show the
heights of all my assets.
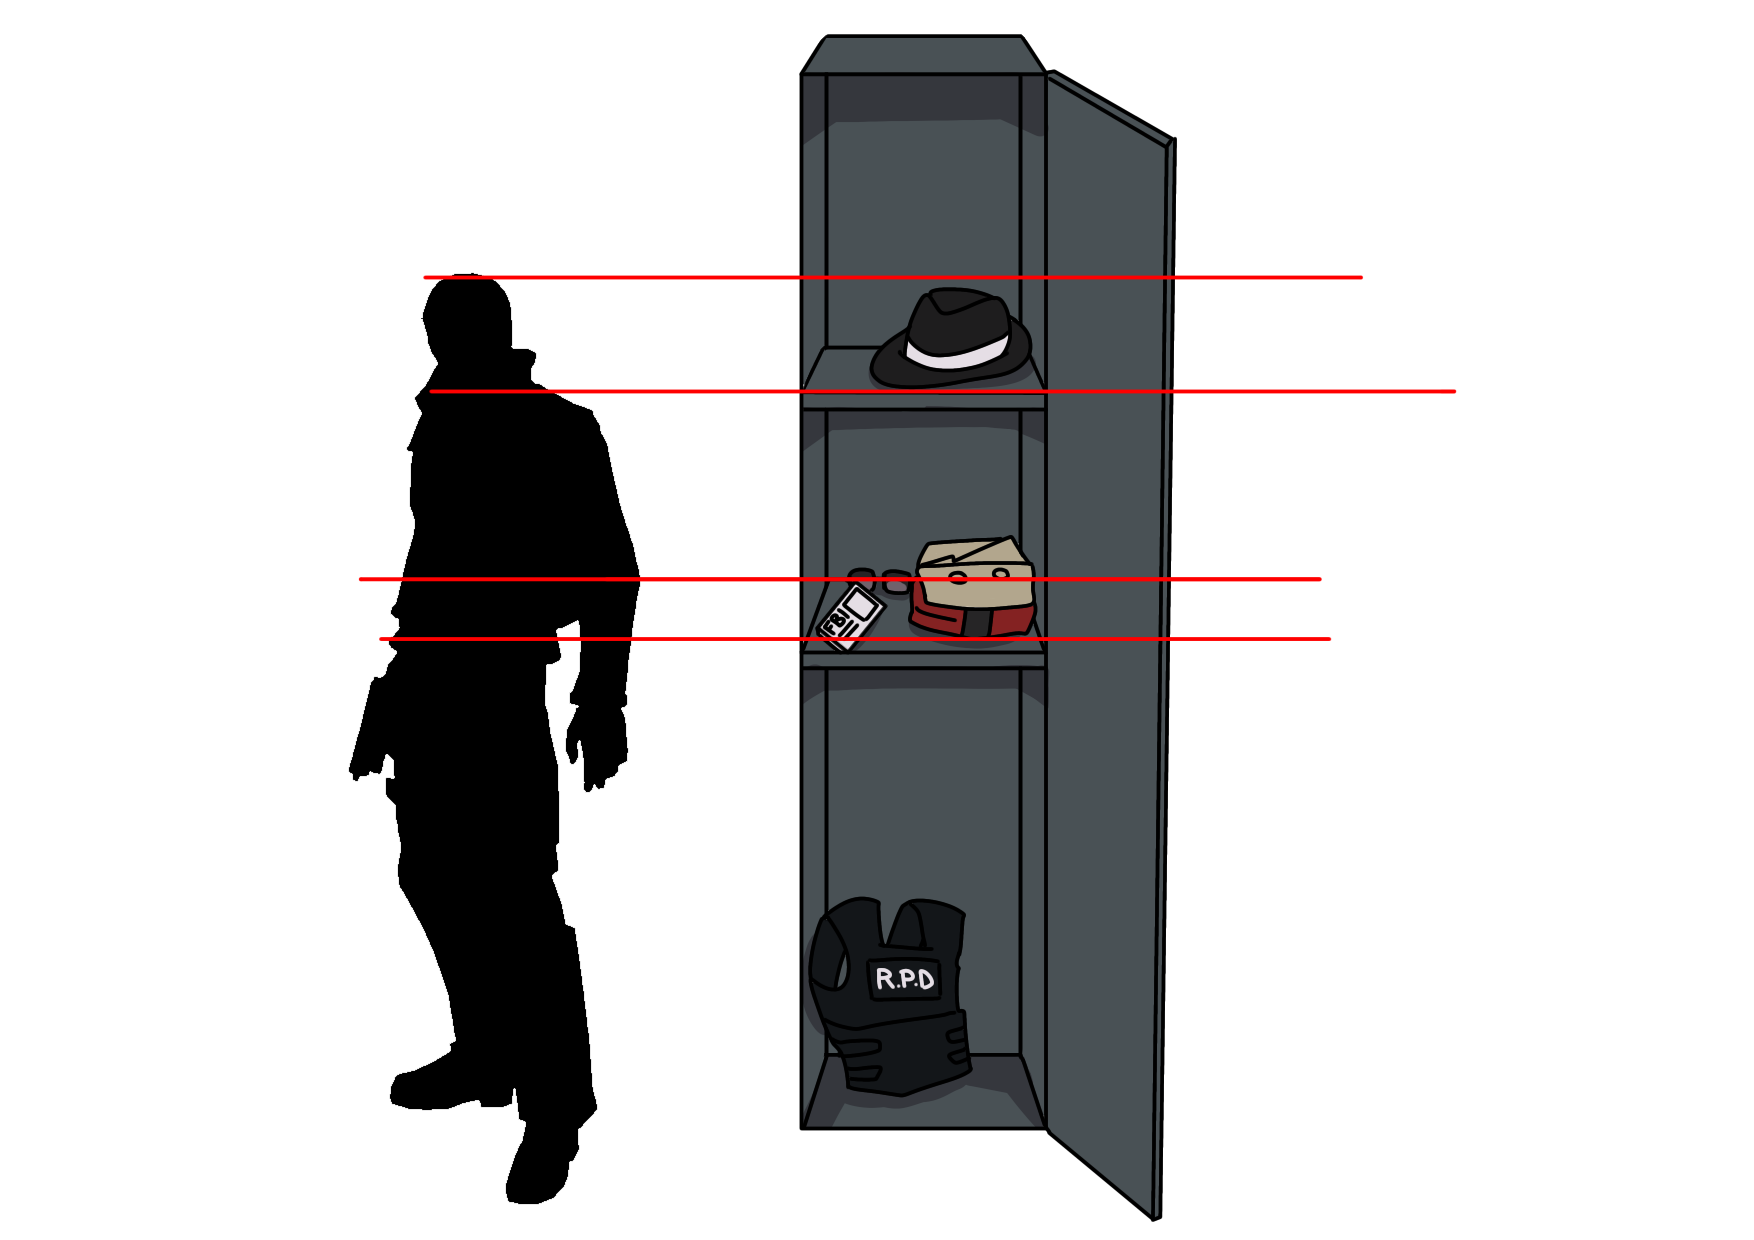
Figure 2.1.1, Shelf Alignment
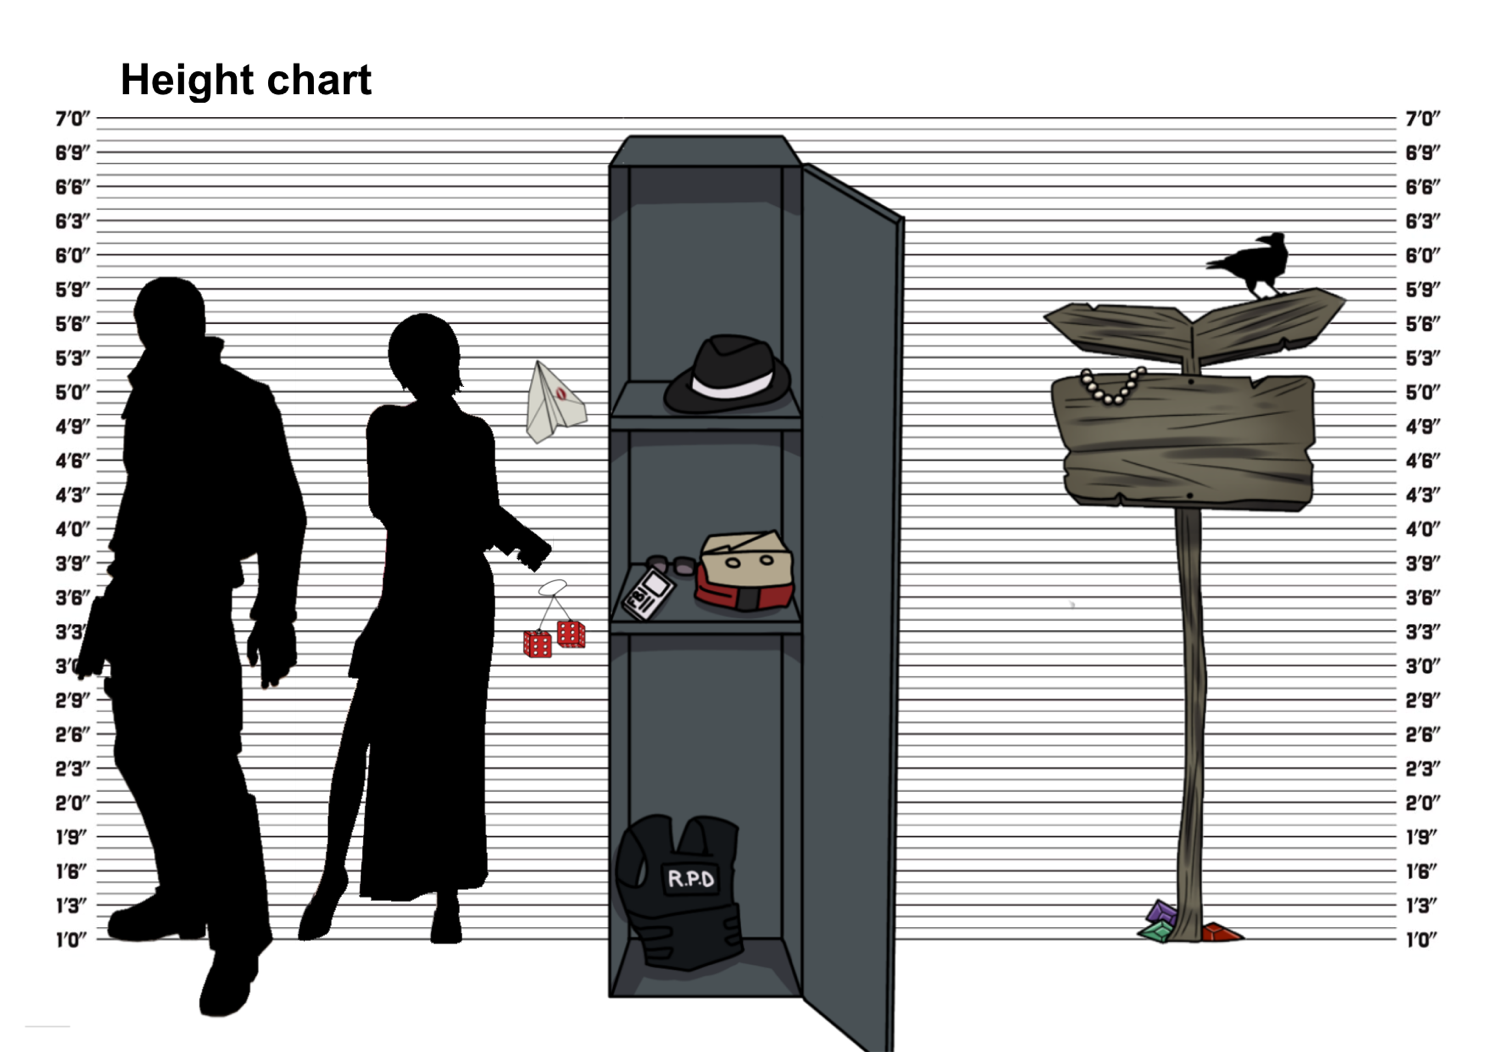
Figure 2.1.2, Height Chart
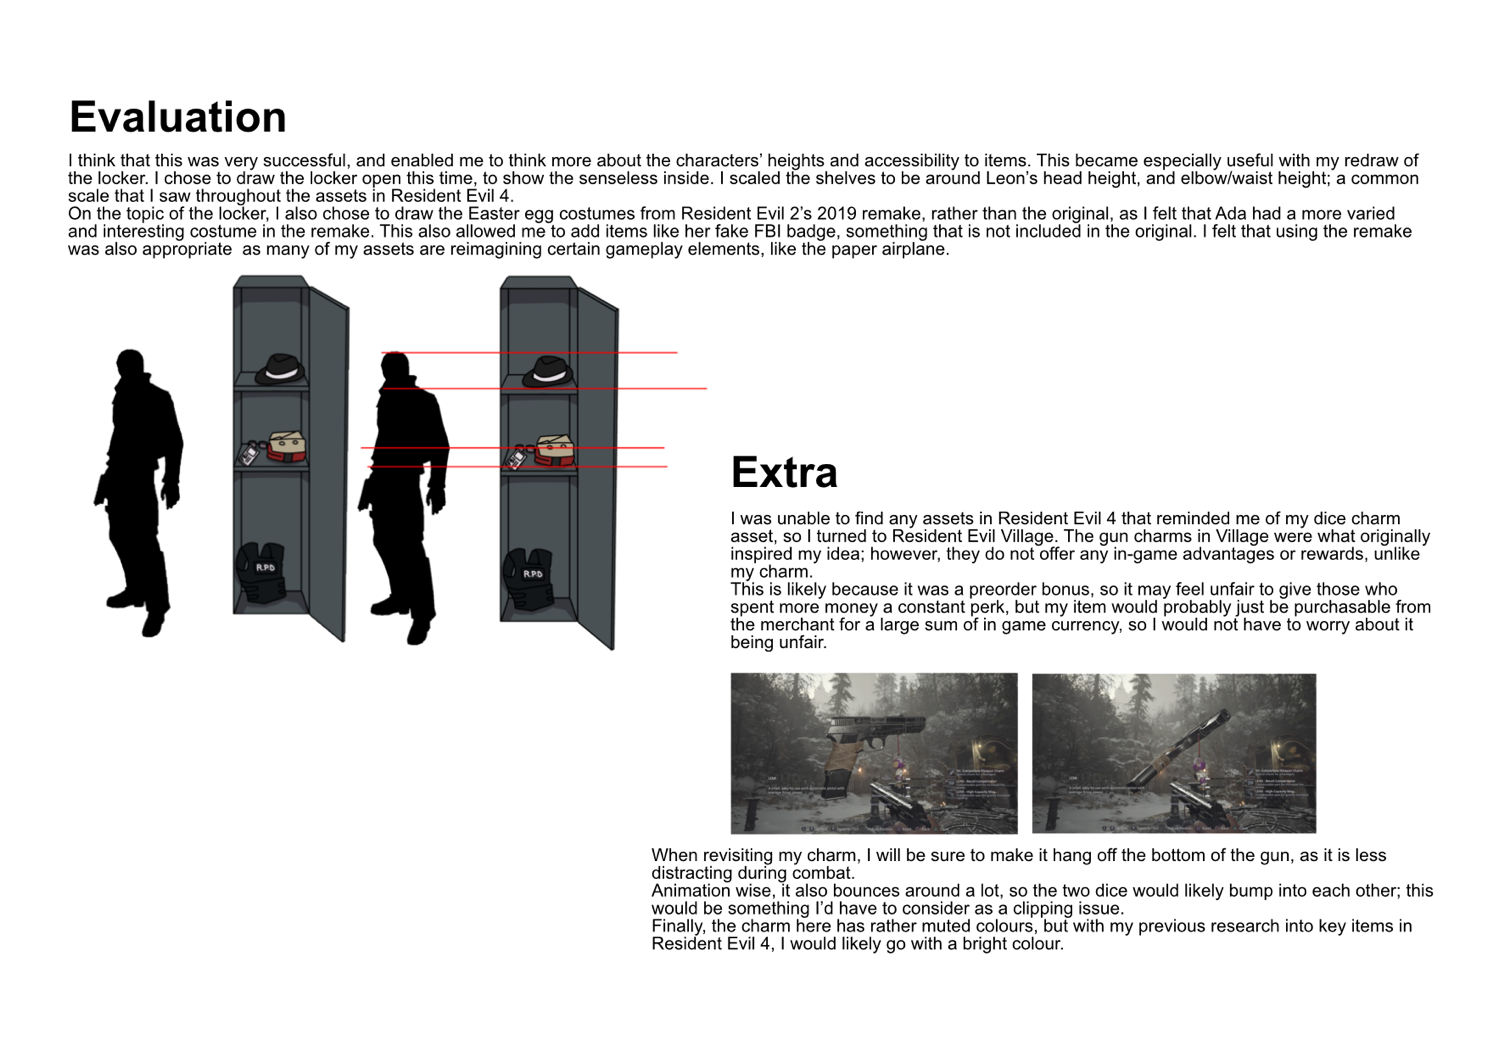
Figure 2.1.3, Evaluation
PHOTOSHOP 3.0
Once I had researched and designed these assets, the last step was
to photoshop mock-ups of what the asset would look like in a realistic
style. This step was definitely the most difficult, due to my lack of
Photoshopping experience, but I also think that most of my assets
look great in this style.
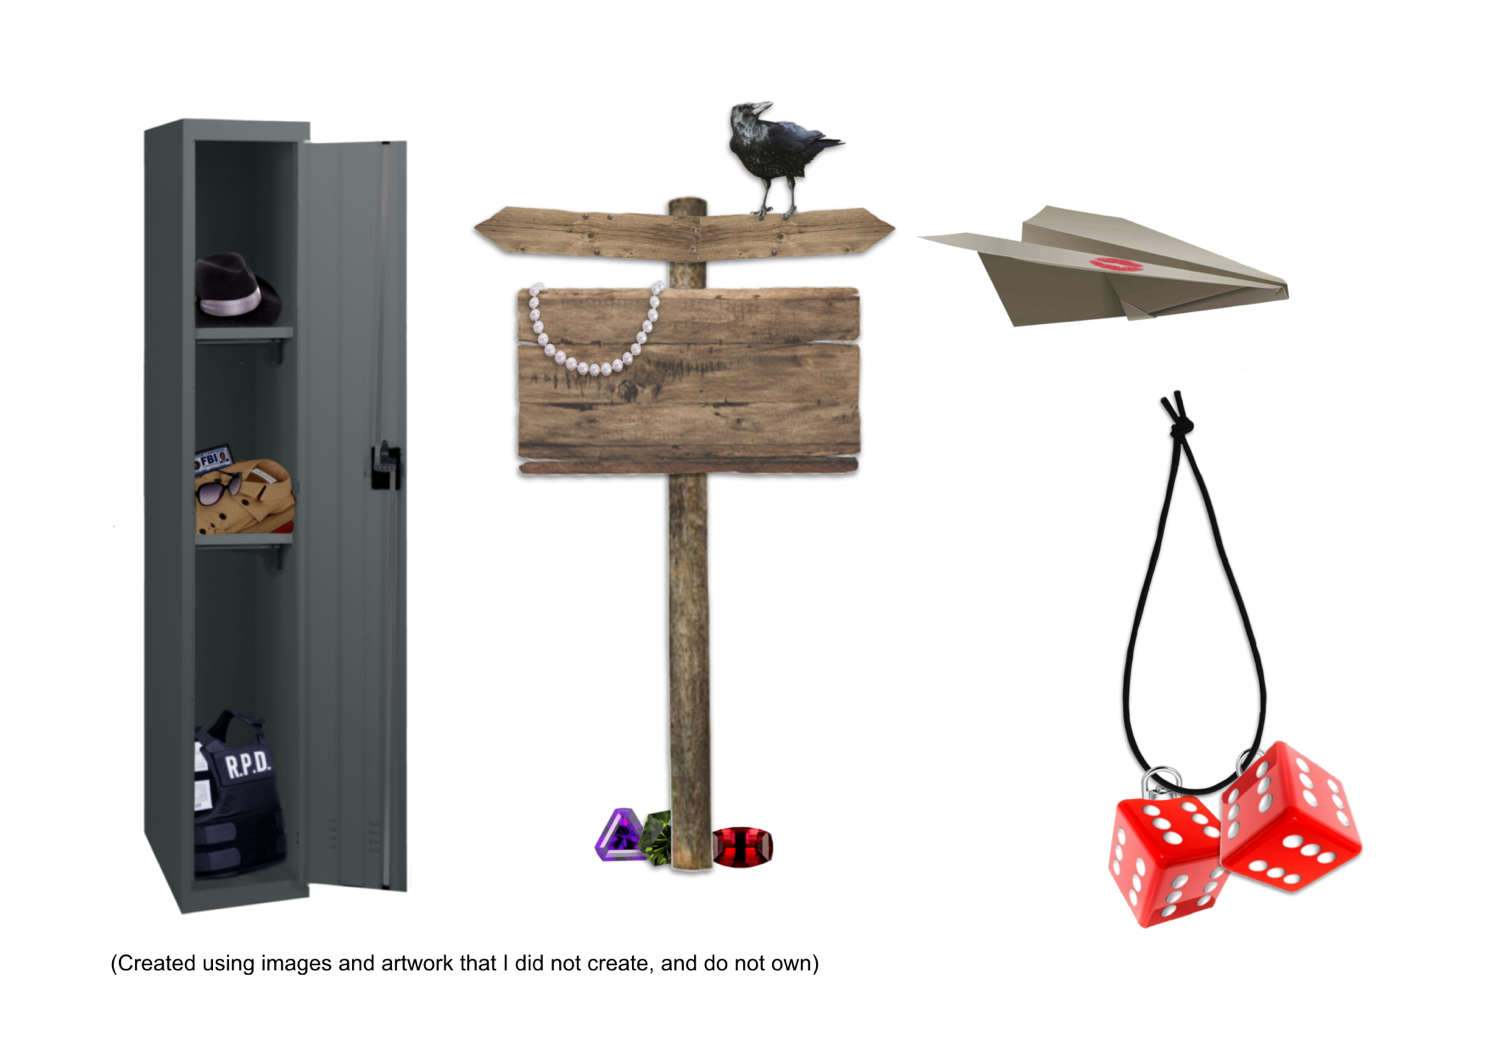
Figure 3.0.1, 3D assets
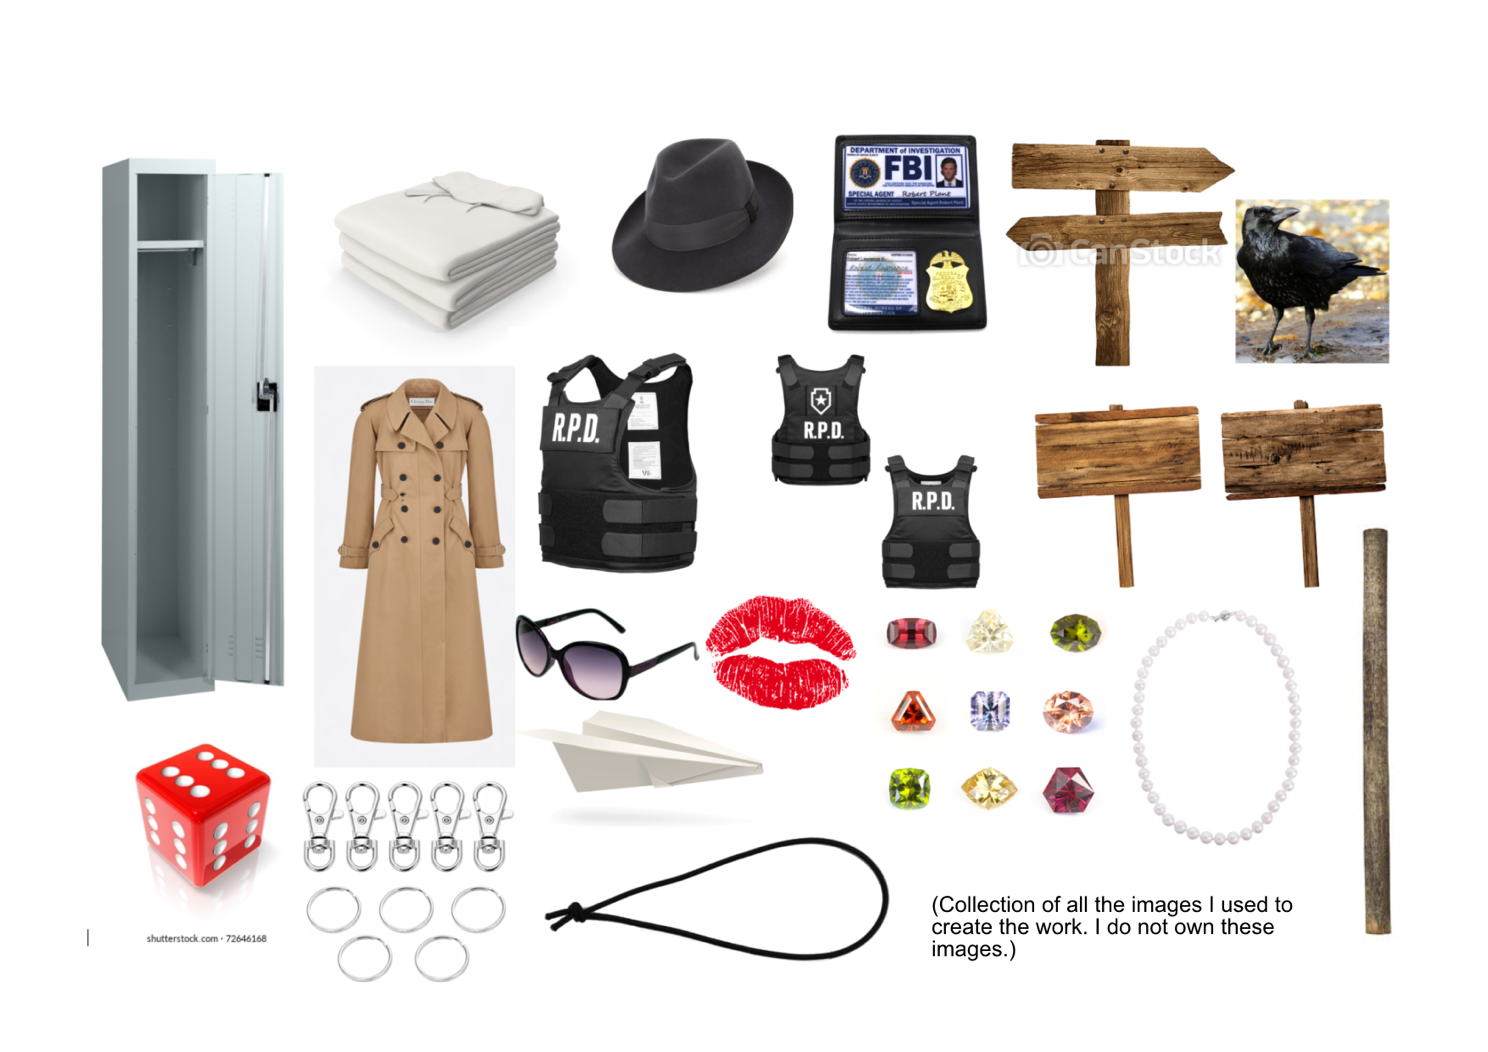
Figure 3.0.2, Source Images
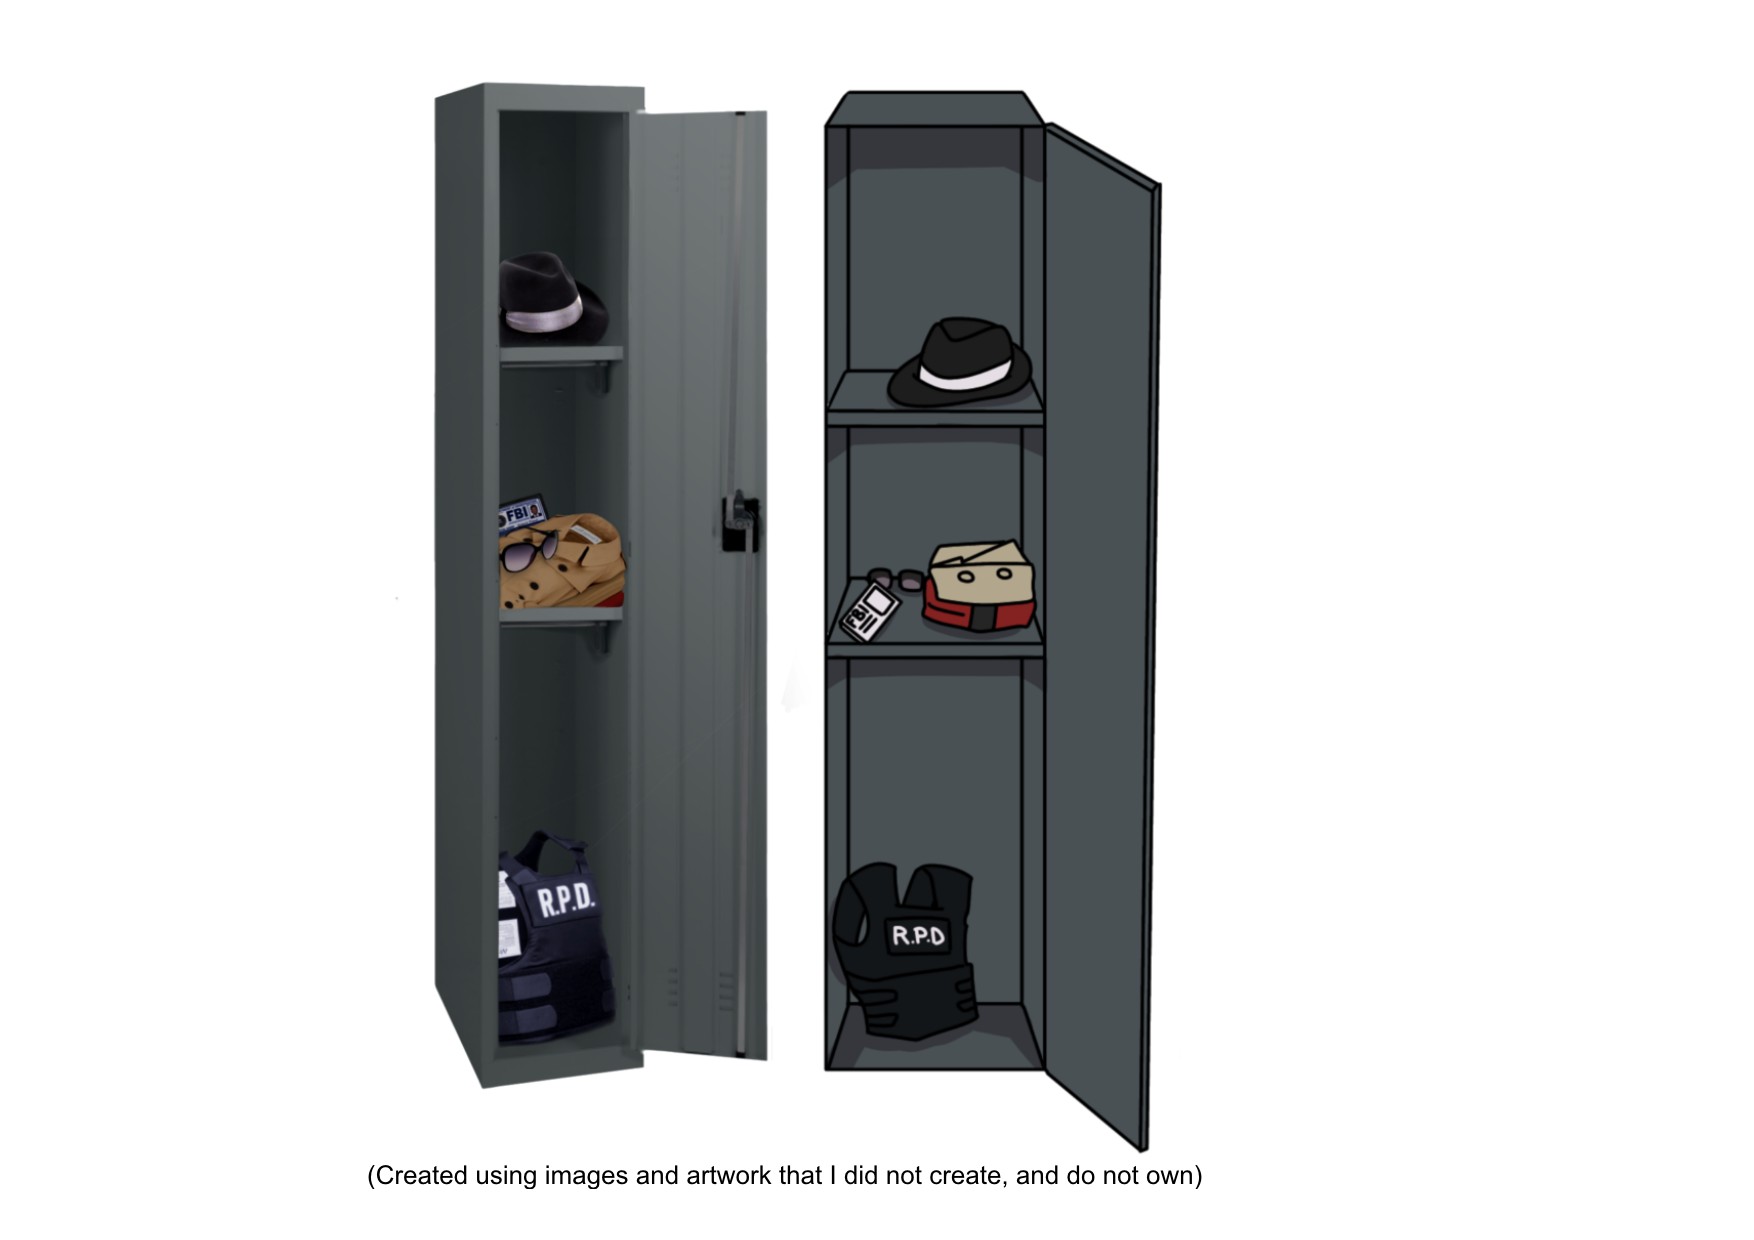
Figure 3.0.3, Concept Art Besides 3D Image
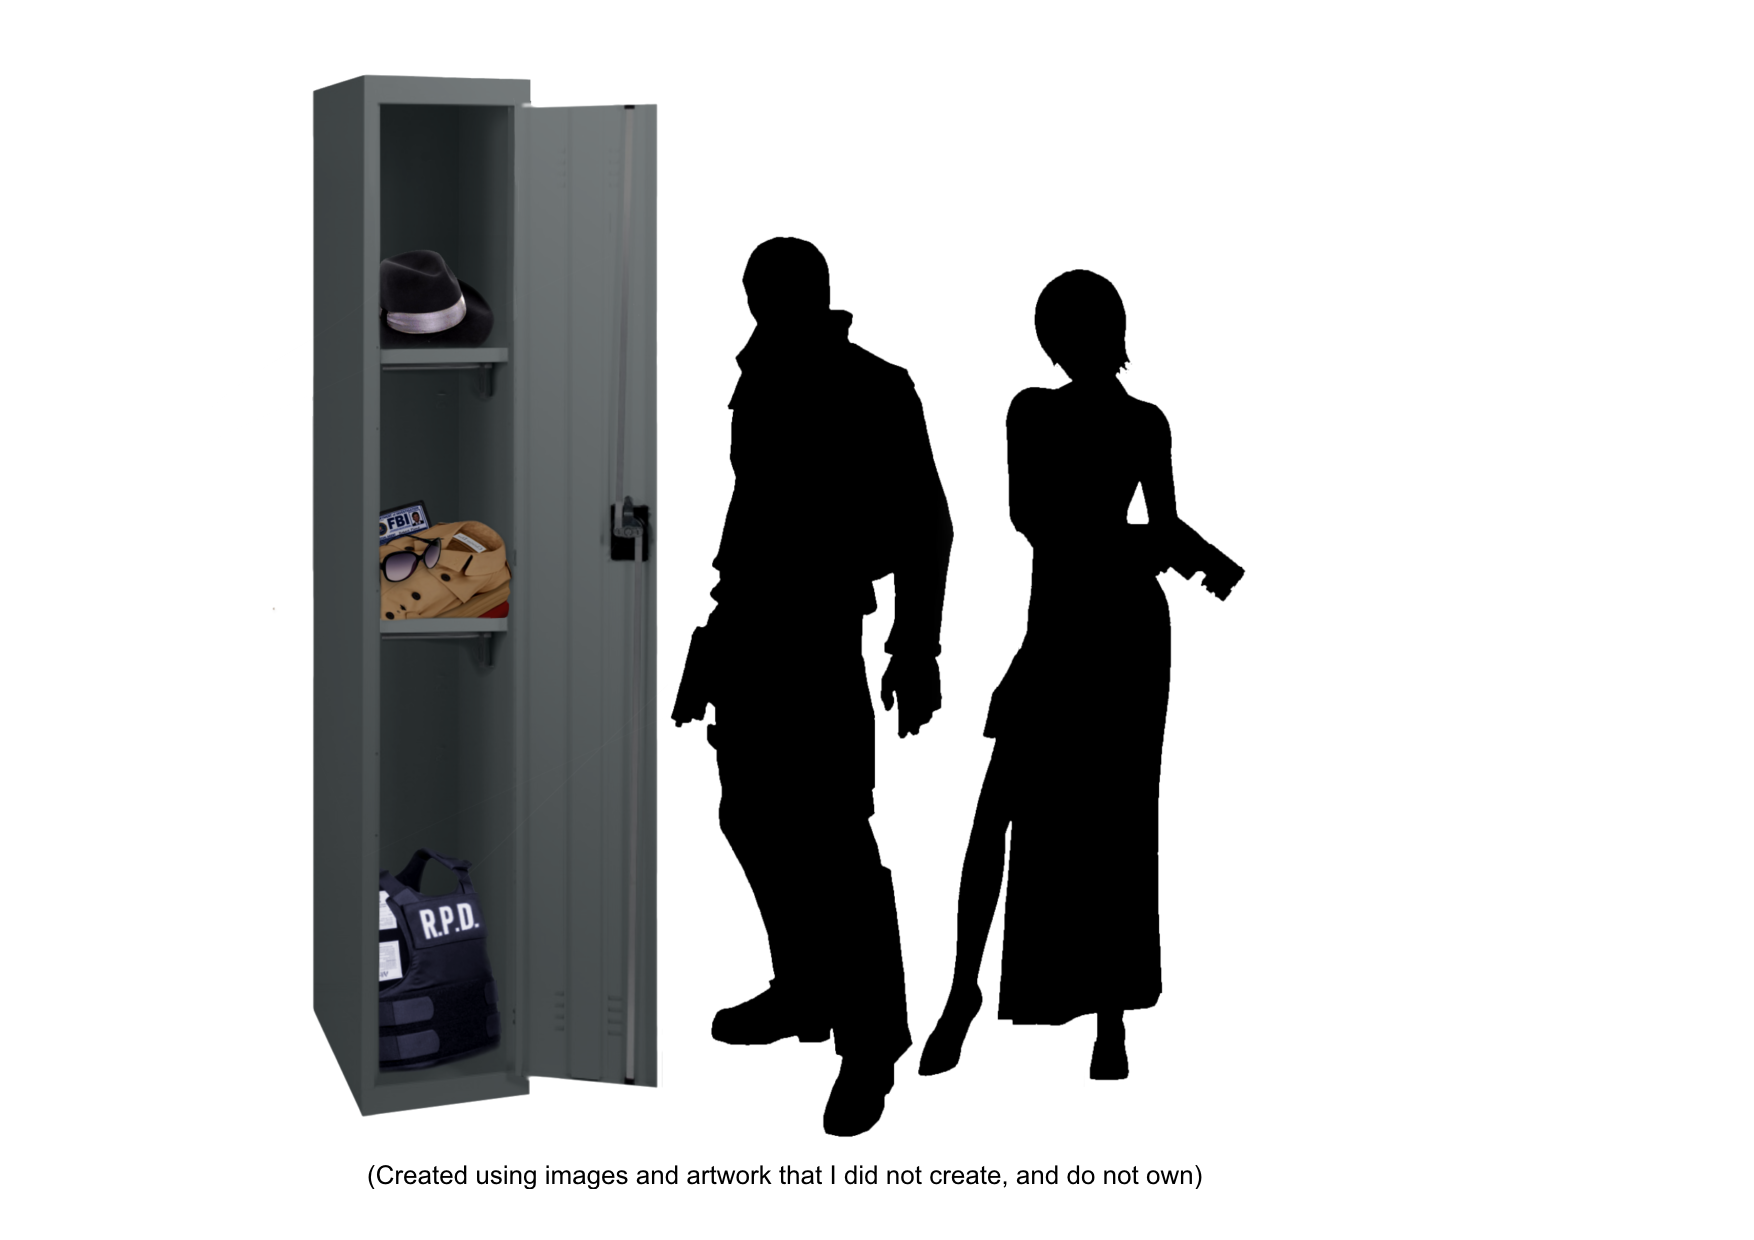
Figure 3.0.4, Height Comparison
SCENE PLACEMENT 3.1
Now with 3D recreations of my assets, the next step was to photoshop
them into a screenshot, to create the illusion of each one being a
part of the game. Looking back at this part of the project, I think
the smaller items like the dice and airplane were much more successfully
imported than the larger items.
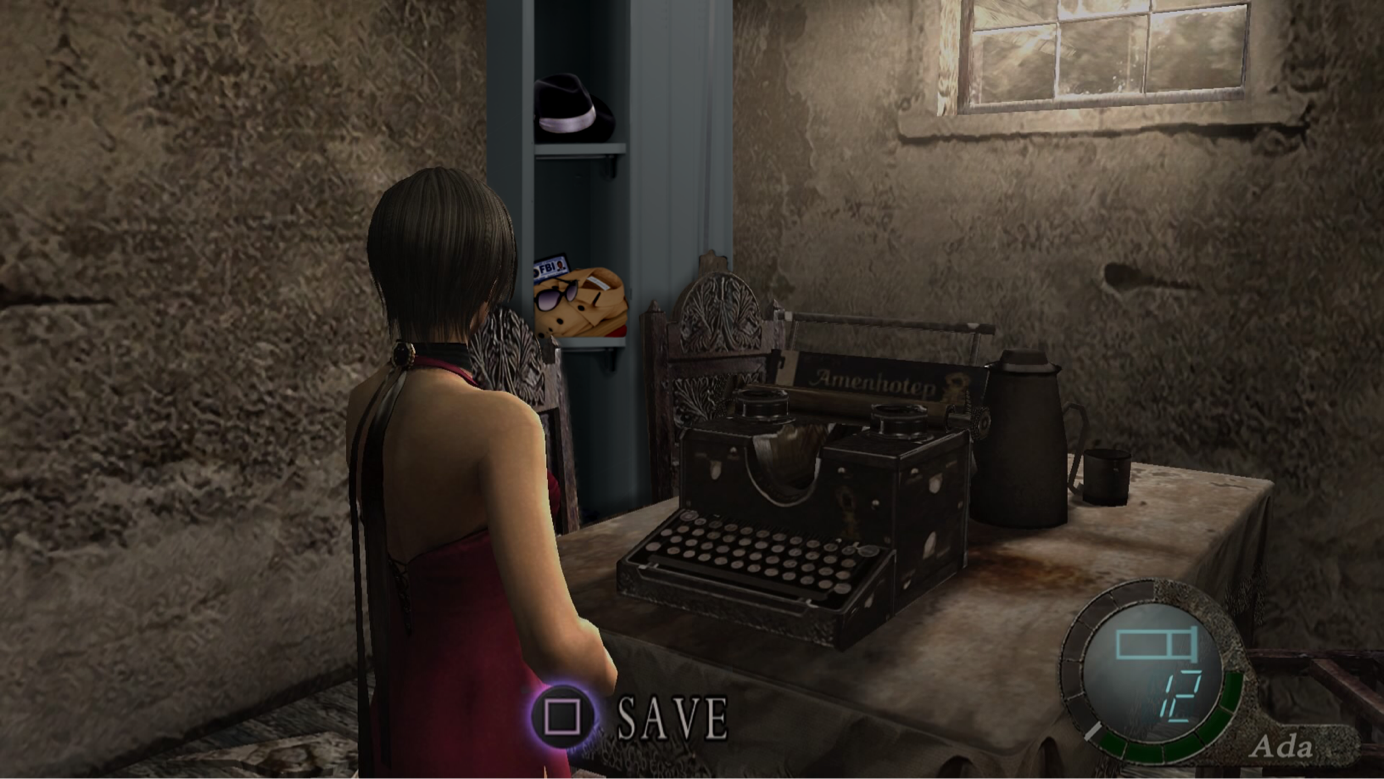
Figure 3.1.1, Locker in Scene

Figure 3.1.2, Paper Airplane in Scene

Figure 3.1.3, Dice Charm in Scene
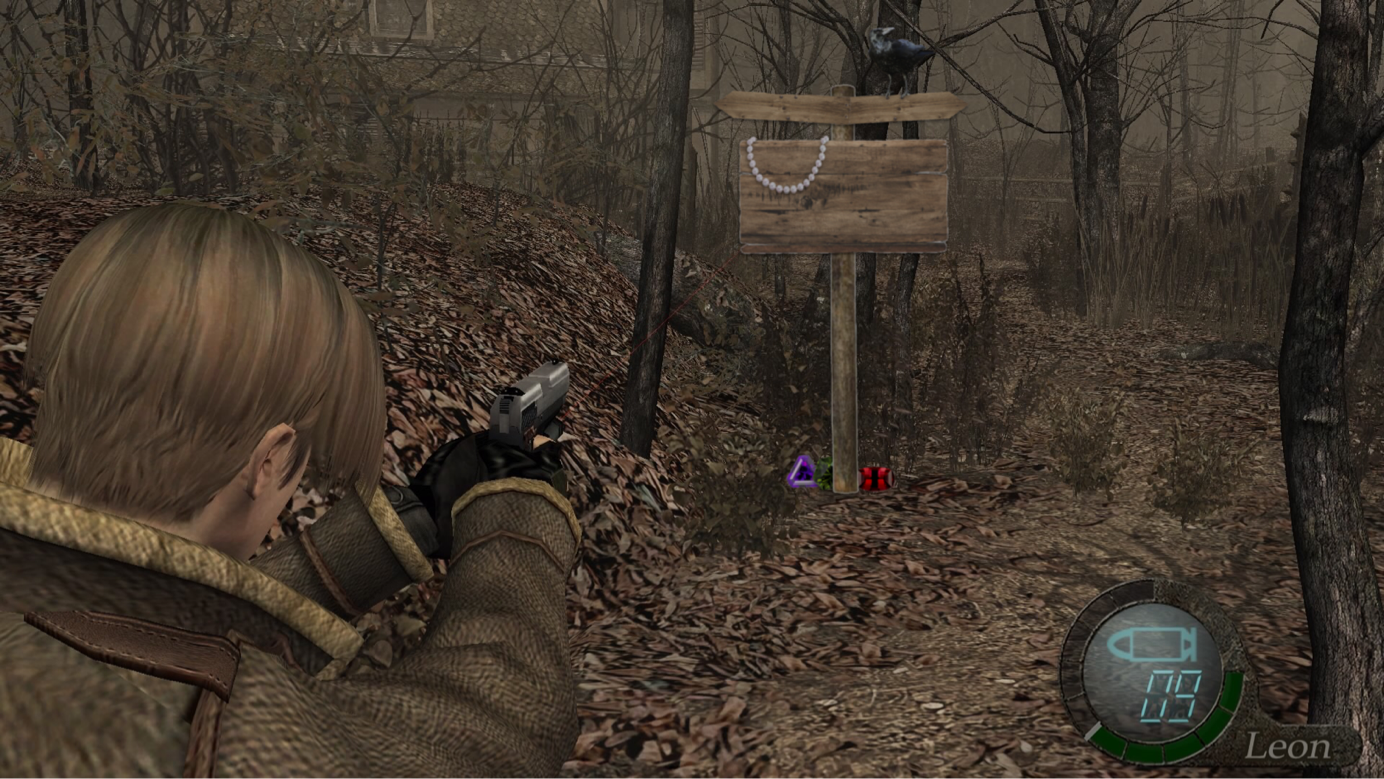
Figure 3.1.4, Sign Post in Scene
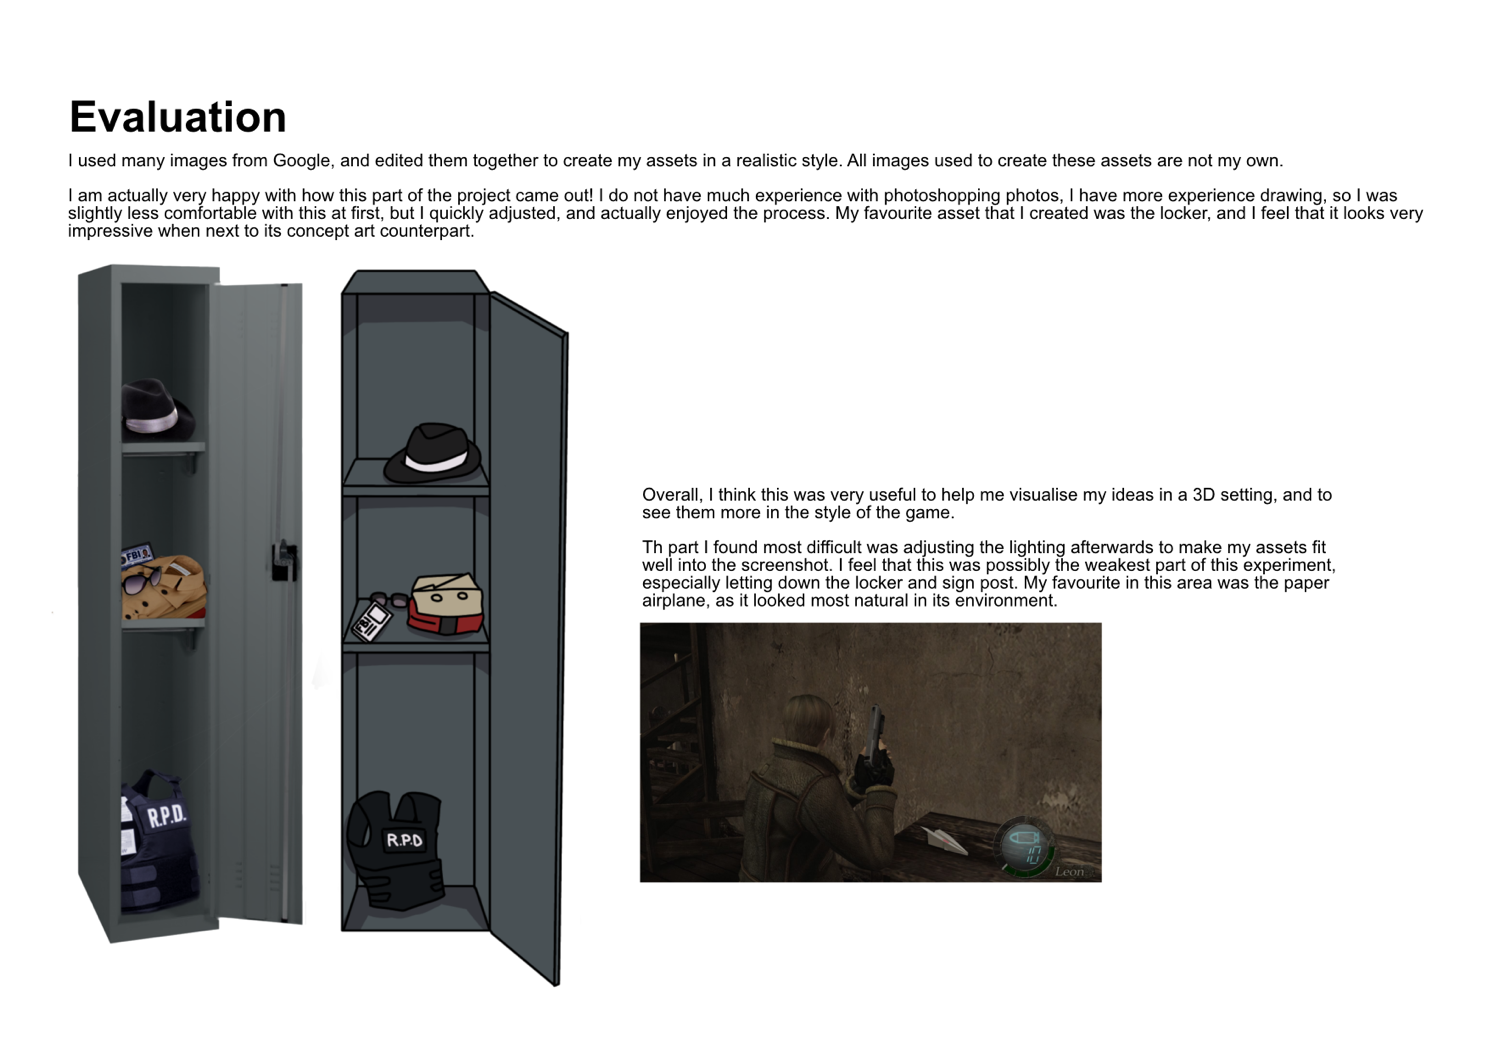
Figure 3.1.5, Evaluation
FINAL THOUGHTS 4.0
Overall I am very pleased with the outcome of this project,
it was also a very enjoyable process, which encouraged me to
work on the project a lot in my own time, or often the day it
was set. This is my favourite process and result of all of my
projects so far this semester, and was a great start to my
university experience.